66 Chapter 4 Viewfinder Screen Indications and Menus
Chapter 4 Viewfinder Screen Indications and Menus
Menu Operation
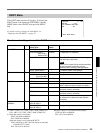
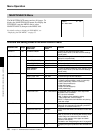
MAINTENANCE Menu
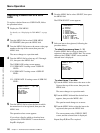
<RESET> M1 TOP
ALL MENU RESET
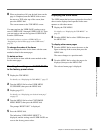
The MAINTENANCE menu consists of 6 pages. To
display the MAINTENANCE menu, first display the
TOP MENU, turn the MENU dial to select
MAINTENANCE, then press the MENU dial.
For details on how to display the TOP MENU, see
“Displaying the TOP MENU” on page 55.
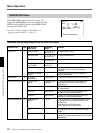
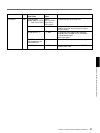
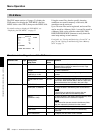
Structure and setting values of the MAINTENANCE menu
Submenu title Page Setting item: Selectable Remarks
Initial value values
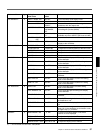
<RESET> M1 ALL MENU RESET — To reset all user-set menu items to the
factory-preset values (The date and time settings
are not reset.)
<GEN LOCK> M2 GENLOCK — GENLOCK settings (No value is displayed when
genlock is not performed.)
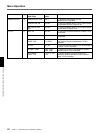
H PHASE [COARSE]: 0 –99 to 0 to 99 To adjust the horizontal phase
H PHASE [FINE]: 0 –99 to 0 to 99 To fine-adjust the horizontal phase
SC PHASE: 0 0 to 99 To adjust the SC phase
MAINTENANCE — To reset the MAINTENANCE menu settings to the
MENU RESET: factory-preset values (The date and time settings
are not reset.)
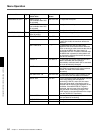
<CLOCK> M3 Ex.)2003/04/30 08:32:45 — To set the date and time
HOUR TYPE: 12H 12H, 24H To select the type of time indication
DATE TYPE: 1 1 to 6 To select the type of date indication:
1: Y/Mn/D (year/month/day, month in numerics)
2: Mn/D (month/day, month in numerics)
3: D/M/Y (day/month/year)
4: D/M (day/month)
5: M/D/Y (month/day/year)
6: M/D (month/day)
CLOCK IND: OFF OFF, CAM, BARS To select the clock indication to be output from
the VIDEO OUT connector:
OFF: No clock indication
CAM: To display clock indication during
video output and color-bar output
BARS: To display the clock indication only during
color-bar output
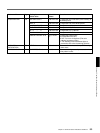
<CAMERA ID> M4 CAMERA ID: — Up to 8 characters are output during color-bar
output (On the character-input screen, press RET
to register an entered camera ID.)
CAMERA ID IND: OFF ON, OFF To turn on/off the camera ID indication in color bar
mode
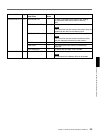
<LENS SELECT> M5 LENS: 3 1 to 16 Select the lens number according to the lens to be
used. (If your lens is not among the choices, shoot
a white subject and select the lens number for
which no color appears at the upper and lower
portions of the screen.)
For details, see “Designating the lens” on page 83.
— To display the typical products of the selected lens
file


