


44
Making the disc compatible with playback on other devices or DVD drives
(Finalizing) (Continued)
b Notes
• It takes from a minute to a maximum of several
hours to finalize a disc. The shorter the amount
of material recorded on the disc, the longer it
takes for finalizing.
• Use the AC Adaptor as the power source to
prevent your camcorder from running out of
power during finalizing.
• When you finalize a double-sided disc, you
must finalize each side of the disc individually.
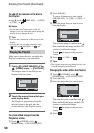
1 Place your camcorder in a stable
position, and connect the AC
Adaptor to the DC IN jack on your
camcorder.
2 Turn on the power by turning the
POWER switch.
3 Insert the disc that you want to
finalize.
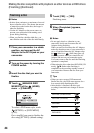
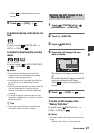
4 Touch (MANAGE DISC/
MEMORY) of the (HOME)
menu t [FINALIZE].
To select a DVD menu style, touch
(OPTION) t [DVD MENU]
(p. 45).
Go to step 5 if you want to finalize the
disc using [STYLE1] (default setting).
5 Touch [YES] t [YES].
Finalizing starts.
6 When [Completed.] appears,
touch .
b Notes
• Do not apply shock or vibration to your
camcorder, and do not disconnect the AC
Adaptor during finalizing.
When you need to disconnect the AC Adaptor,
make sure that the power of your camcorder is
set to off and disconnect the AC Adaptor after
the (Movie) or (Still) lamp goes off.
Finalizing restarts when you connect the AC
Adaptor and turn on your camcorder again.
You cannot remove the disc until the finalizing
operation is completed.
• When using the discs other than DVD-RW (VR
mode), Z flashes after finalizing is
completed on the recording standby screen of
your camcorder. Remove the disc from your
camcorder.
z Tips
• When you set to create a DVD menu and
finalize the disc, the DVD menu appears for a
few seconds while finalizing the disc.
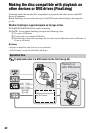
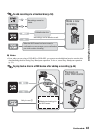
• After the disc is finalized, the disc type/
recording format indicator changes as shown
below:
Finalizing a disc
DVD-RW (VIDEO mode)
DVD-RW (VR mode)
DVD+RW
DVD-R
DVD+R DL