


53
Editing
1 Insert the recorded disc into your
camcorder.
2 Turn on your camcorder, and
press (VIEW IMAGES).
Set [TV TYPE] according to the display
device (p. 40, 68).
3 Insert the recording media in the
recording device.
If your recording device has an input
selector, set it to the input mode.
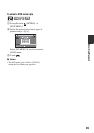
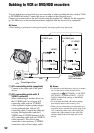
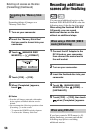
4 Connect your camcorder to the
recording device (VCR or DVD/
HDD recorder) with the A/V
connecting cable (supplied) 1 or
an A/V connecting cable with S
VIDEO (optional) 2.
Connect your camcorder to the input
jacks of the recording device.
5 Start the playback on your
camcorder, and record it on the
recording device.
Refer to the instruction manuals
supplied with your recording device for
details.
6 When dubbing is finished, stop
the recording device, and then
your camcorder.
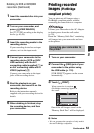
Printing recorded
images
(PictBridge
compliant printer)
You can print out still images using a
PictBridge compliant printer, without
connecting the camcorder to a computer.
Connect your camcorder to the AC Adaptor
to obtain power from the wall socket
(p. 20).
Insert the “Memory Stick Duo” containing
still images into your camcorder and turn
on the printer.
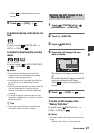
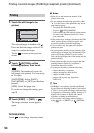
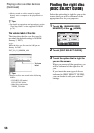
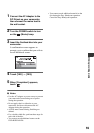
1 Turn on your camcorder.
2 Connect the (USB) jack of your
camcorder to the printer using
the USB cable (p. 112).
[USB SELECT] appears on the screen
automatically.
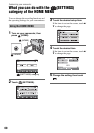
3 Touch [ PRINT].
One of the still images stored on the
“Memory Stick Duo” will be displayed.
b Notes
• We can guarantee the operation of only models
that are PictBridge compatible.
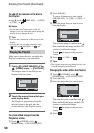
Connecting your camcorder to
the printer
When connection is complete,
(PictBridge connecting) appears on
the screen.
Dubbing to VCR or DVD/HDD
recorders (Continued)
Continued ,