


43
Locations and Functions of Parts
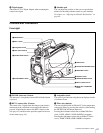
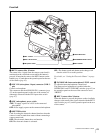
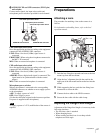
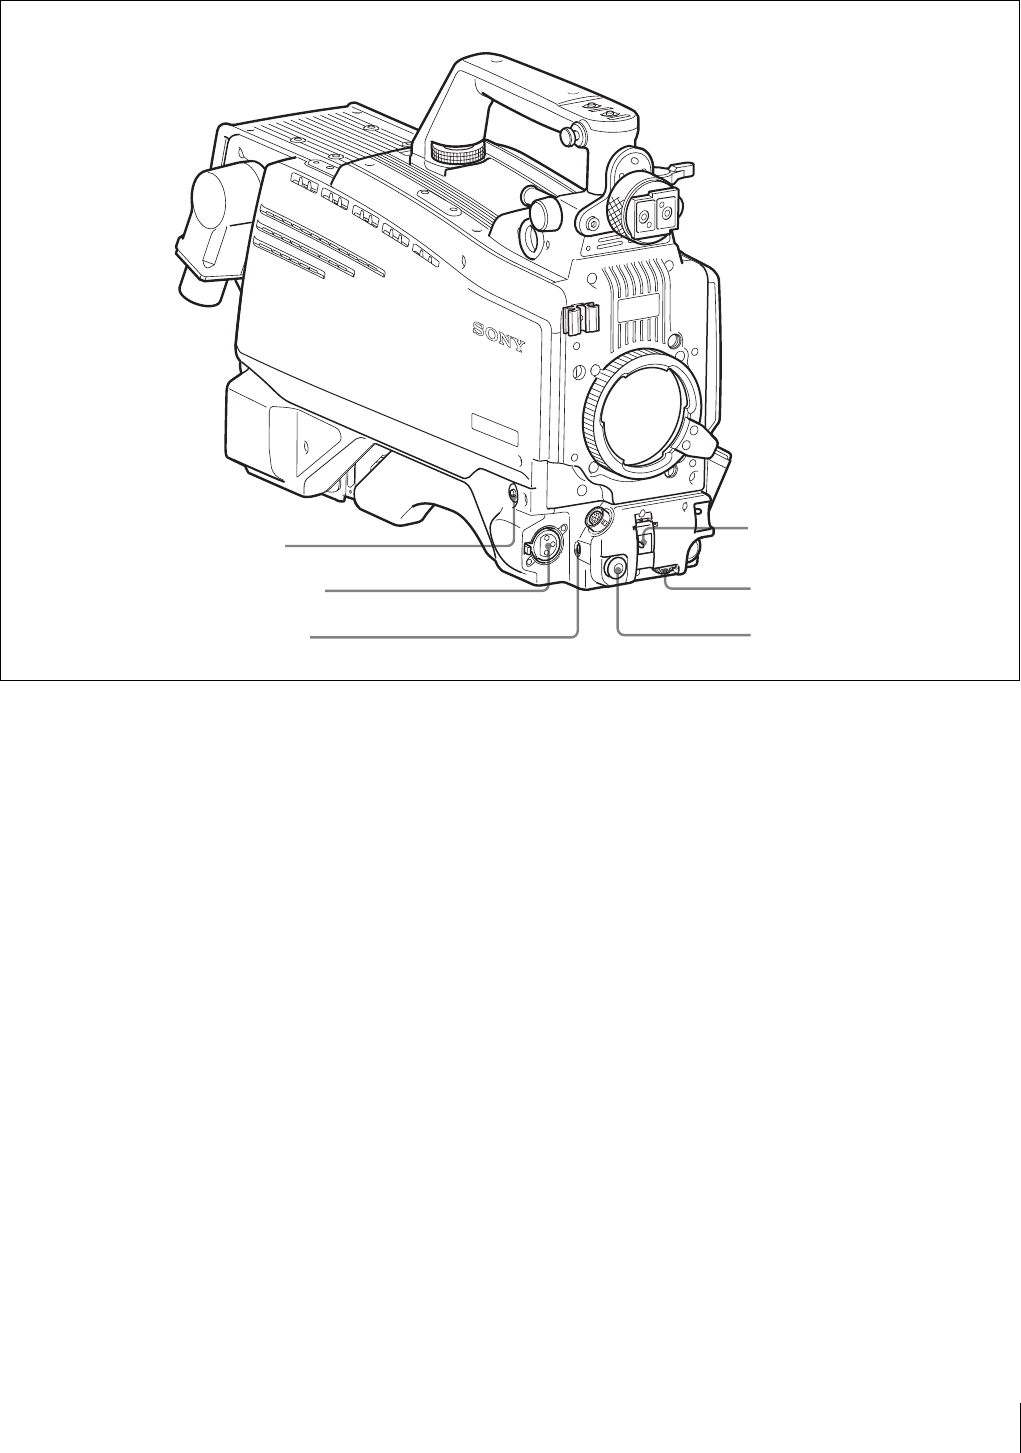
Front left
a RET 1 (return video 1) button
The return video 1 signal from the camera control unit is
monitored on the viewfinder screen while this button is
pressed. It function the same as the RET1 buttons on the
handle (page 41) and that on the operation panel on the rear
of the camera (page 45).
b MIC 1 IN (microphone 1 input) connector (XLR 3-
pin)
Connect a microphone.
This connector and the AUDIO IN CH-1 connector (page
47) on the operation panel on the rear of the camera are
alternately activated with the CH1 input select switch
(page 47).
c MIC (microphone) power switch
+48V: To supply a power of +48 V to the connected
microphone.
OFF: Not to supply a power to the connected microphone.
d SHUTTER switch
Used for setting the electronic shutter functions when the
camera is used in stand-alone status without connecting a
camera control unit.
OFF: The electronic shutter does not function.
ON: The electronic shutter is activated.
SEL: The shutter speed and shutter mode change each
time the switch is set to this position.
For details, see “Setting the Electronic Shutter” on page
54.
e INCOM/EAR (intercom/earphone) LEVEL control
To adjust the intercom/earphone volume level.
The intercom level adjustment is enabled when the
INTERCOM 1 and 2 LEVEL/MIC switches (page 45) on
the operation panel on the rear of the camera are set to
“FRONT.”
f RET 2 (return video 2) button
When this button is pressed, the picture on the viewfinder
changes to the return video signal selected with the RET 2
select switch (page 45) on the operation panel on the rear
of the camera.
dSHUTTER switch
eINCOM/EAR LEVEL control
fRET 2 button
bMIC 1 IN connector
aRET 1 button
cMIC power switch