


GB
18 Installing the Camera
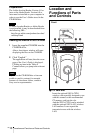
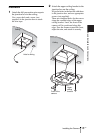
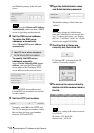
9 Temporarily attach the cable cover by
inserting the raised protrusions on the
cable cover into the gaps at the rear of
the upper ceiling cover. Then fix the
cable cover using the supplied two
screws (
3M3 ×6).
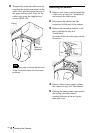
Take proper steps to ensure that the load
of the connected cables does not cause
problems.
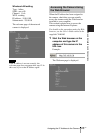
Removing the camera
1 Remove two screws used to attach the
cable cover in step 9 of “Installation”
and remove the cable cover.
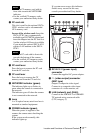
2 Disconnect the cables from the
connectors at the rear of the camera.
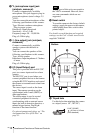
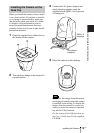
3 Remove the mounting bracket cover
that is attached in step 6 of
“Installation”.
First take off the tab on the edge as in the
illustration.
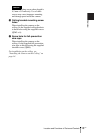
4 Remove three screws used to attach
the camera in step 5 of “Installation.”
5 Pushing the entire camera up towards
the ceiling, turn the camera
counterclockwise as far as it goes,
then pull it out.
Note
Ceiling
3M3 × 6
(supplied)
Tab