


19
GB
Installing the Camera
Basic Installation and Connections
When you install the camera, always install
it on a level surface. If you have to install it
on a sloping or uneven surface, make sure
that the place where you install it is within
±5 degrees of the horizontal in order to
ensure the pan/tilt mechanism functions
properly. In this case, be sure to take the fall-
prevention measures.
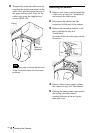
1 Paste the supplied four rubber feet on
the bottom of the camera.
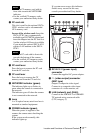
2 Turn the Sony badge on the front to fit
top and bottom.
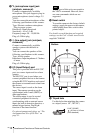
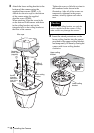
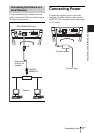
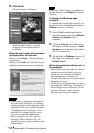
3 Connect the AC power adaptor and
attach the plug retainer using the
supplied screw (
3M3 ×6) to prevent
it coming out.
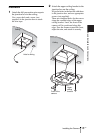
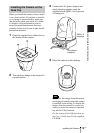
4 Place the camera on the desktop.
By default, the images from the camera
are displayed normally when the camera
is installed on the ceiling. To display the
images from the camera in correct way
when you place the camera on the desk
top, use the E.flip function.
For the setting of the E.flip function, see
the User’s Guide stored in the supplied
CD-ROM.
Installing the Camera on the
Desk Top
Note
Plug retainer
(supplied)
3M3 × 6
(supplied)