


78
HDR-HC3
2-661-355-11(1)
E:\SONY\2661355111\01US07BAS.fm
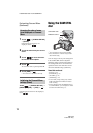
1 Slide the POWER switch to turn
on the PLAY/EDIT lamp.
2 Set the input signal of your
camcorder.
Set [VCR HDV/DV] to [AUTO] when
recording from an HDV format
compatible device.
Set [VCR HDV/DV] to [DV] or
[AUTO] when recording from a DV
format compatible device (p. 65).
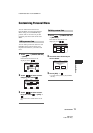
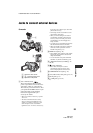
3 Connect your VCR as a player to
your camcorder.
When an i.LINK cable is connected, the
format of the input signal (
or ) will be
indicated on the LCD screen of your
camcorder (This indicator may appear
on the screen of the playback device,
however, it will not be recorded).
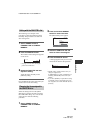
4 Insert a cassette into the VCR.
5 Operate your camcorder to record
movies.
Touch t [ REC CTRL] t
[REC PAUSE].
If the desired item is not displayed on
the screen, touch / until the item
is displayed.
6 Start playing the cassette on your
VCR.
The picture played on the connected
device appears on the LCD screen of
your camcorder.
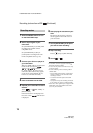
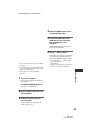
7 Touch [REC START] at the point
you want to start recording.
8 Stop recording.
Touch (Stop) or [REC PAUSE].
9 Touch t .
• You cannot record TV programs from the
HDV/DV Interface (i.LINK).
• You can record pictures from DV devices only
in the DV format.
• Note the following when connecting with an
i.LINK cable:
– The recorded picture becomes rough when a
picture is paused on your camcorder while
recording to a VCR.
– You cannot record the picture and sound
separately.
– If you pause or stop the recording and restart
it, the picture may not be recorded smoothly.
• When a 4:3 video signal is input, it appears with
black bands on the right and left sides on the
screen of your camcorder.
Recording movies
Recording pictures from a VCR (Continued)