masterpage:Right
filename[D:\WORKS\Mavica\2nd\3066742111MVCFD92UC\02GB-
MVCFD92UC\04bas.fm]
B
BB
B Playback
29
model name1[MVC-FD92]
[3-066-742-11(1)]
xInstalling the USB driver
First, install the USB driver to the computer. The USB driver is contained together
with application software for viewing images on a CD-ROM which is supplied with
your camera.
If the drive is not recognized properly, see “Troubleshooting” on page 77.
For Windows 98, Windows 98SE, Windows Me and Windows
2000 Professional users
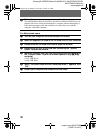
Do not connect your camera to your computer before installing the
USB driver.
1
Make sure that the camera is not connected to your computer.
Do not connect the USB cable in this step.
2
Turn on your computer and allow Windows to load.
3
Insert the supplied CD-ROM in the CD-ROM drive of your computer.
The application software screen appears.
4
Click “USB Driver Installation for Windows 98/98SE, Windows Me,
Windows 2000”.
USB driver installation starts.
5
Follow the on-screen messages to install the USB driver.
If the message appears after the installation to verify that you restart the
computer, restart the computer.
6
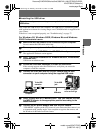
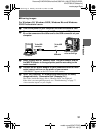
Connect the USB jack (mini-B) on your camera with the USB
connector on your computer using the supplied USB cable.
7
Insert a floppy disk or a “Memory Stick” into your camera, and set
the MS/FD selector to the appropriate position according to the
media inserted.
8
Connect the AC power adaptor and turn on your camera.
“USB MODE” appears on the LCD screen of your camera and the camera is set
to communication standby mode. Your computer recognizes the camera, and
the Windows Add Hardware Wizard starts.
Computer
USB cable
To the USB
connector
To the USB
jack
Push the connector
as far as it will go
01cov.book Page 29 Monday, December 18, 2000 3:34 PM


