


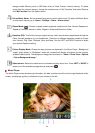


32
• Brightness: press LEFT / RIGHT or on the remote to fine-tune the brightness of the screen.
• Contrast: Press LEFT or RIGHT to make adjustments to the screen’s contrast.
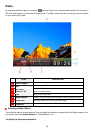
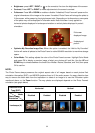
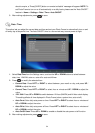
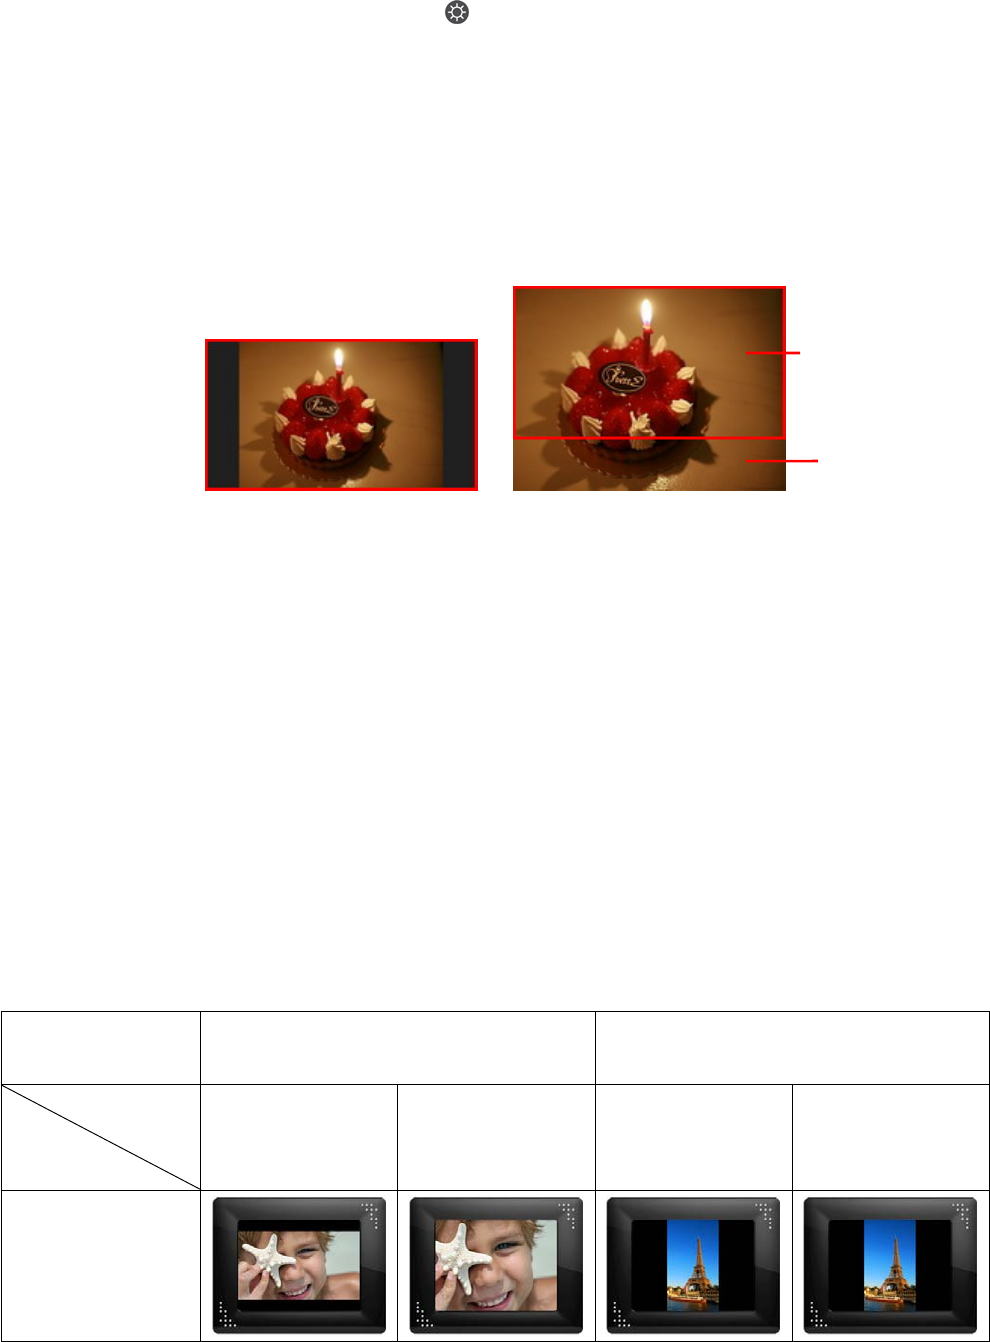
• Fullscreen: Press UP or DOWN to enable or disable. If disabled, Photo Frame will preserve the
original dimensions of the image on the screen. If enabled, Photo Frame will enlarge the photo to
fit the screen, while preserving its original aspect ratio. Depending on its dimensions, some parts
of the photo may not be displayed in fullscreen mode. Note: fullscreen is only applied on
horizontal photos displayed in landscape orientation or vertical photos displayed in portrait
orientation.
Fullscreen disabled Fullscreen enabled
• Optimize My Favorites Image Size: When this option is enabled, the “Add to My Favorites”
funtion will resize all photos to the Photo Frame ’s native 800x600 resolution to maximize storage
space.
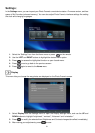
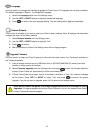
• Color Mode: This setting adjusts the color of the Photo Frame’s screen. Highlight Color Mode
and press OK to display a preview image of what your photos will look like. Use the UP and
DOWN keys to choose between the three Color Modes: Natural, Standard, and Vivid, then press
OK to confirm.
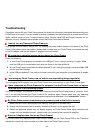
NOTE:
The Photo Frame always preserves the original aspect ratio of all images based on each picture file’s
orientation information (EXIF), and NEVER stretches them to fill the entire screen. An easy, distortion-free
way to remove the black bars from the top/bottom or sides of an image is to use the Fullscreen option
mentioned above, or the Zoom function. The way photos are displayed depends on the Photo Frame’s
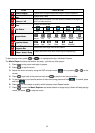
orientation (see graph below)
Detected Photo
Type (EXIF)
Horizontal Vertical
Fullscreen
Mode
Photo Frame
Orientation
Disabled Enabled Disabled Enabled
Landscape (A)
Fullscreen
displayed image
Undisplayed
portion