


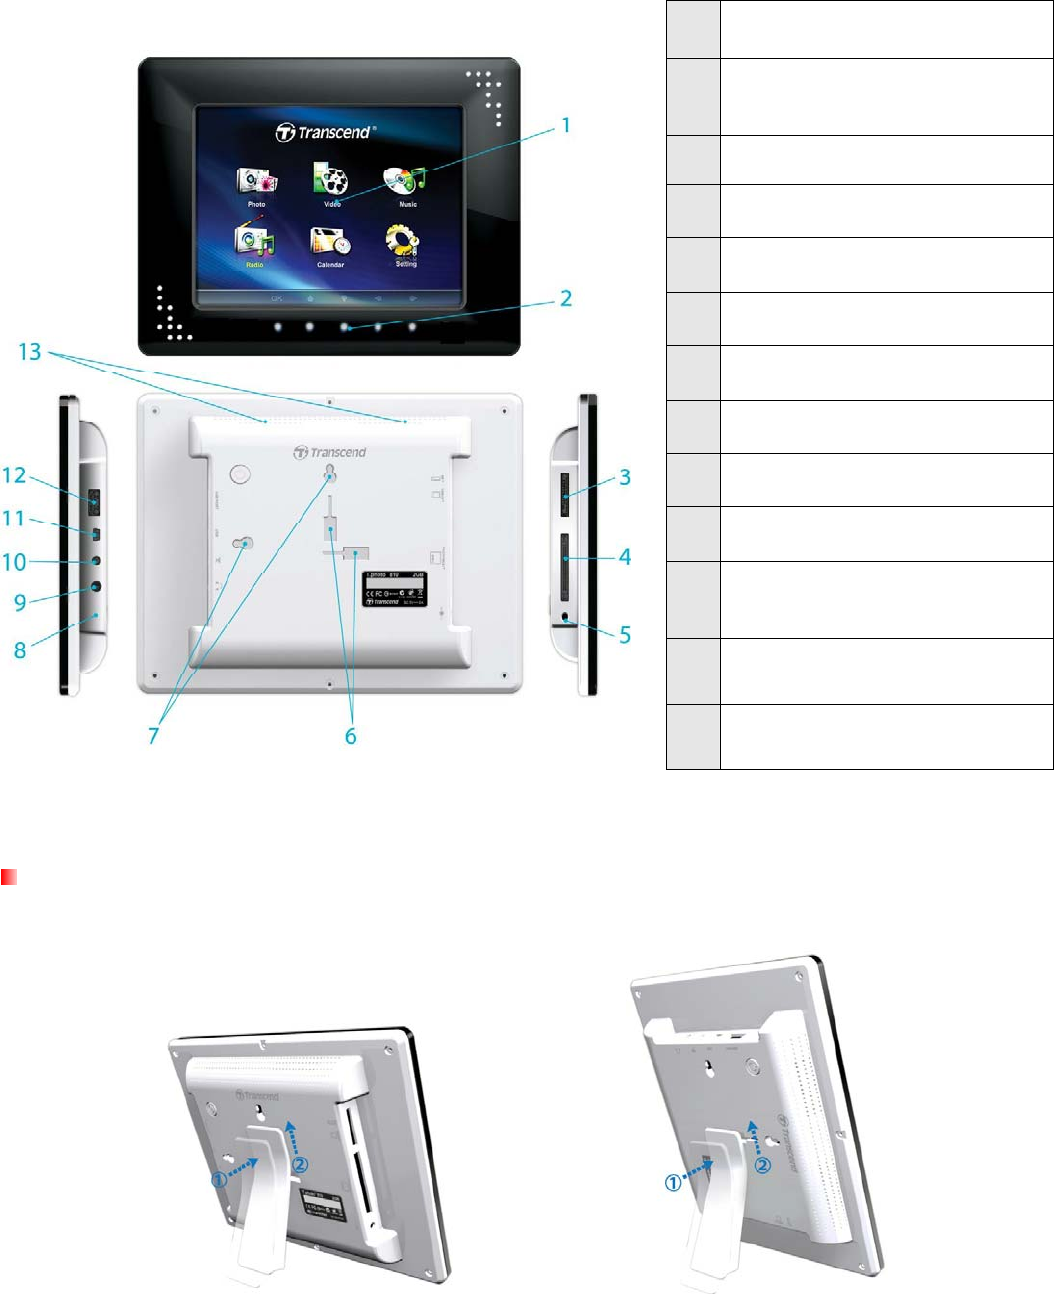
6
Getting Started︱
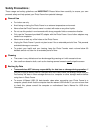
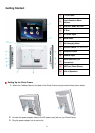
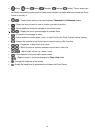
1. 8” LCD Panel
2.
Touch-Sensitive Menu
Buttons
3. SD/SDHC/ MMC/ MS Slot
4. CF Slot
5. DC Power Input
6. Stand Holes
7. Wall-Hanging Holes
8. Recover Switch (For Service Use)
9. Headphone Jack
10. Antenna Input
11.
Mini-B USB Port (PC
Connection)
12. USB Port (Flash Drives)
13. Built-in Speakers
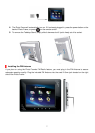
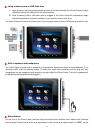
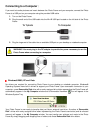
Setting Up the Photo Frame
1. Attach the Tabletop Stand to the back of the Photo Frame using the stand holes shown above.
2. Connect the power adapter cable to the DC power input jack on your Photo Frame.
3. Plug the power adapter into a wall outlet.