10
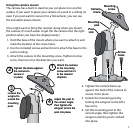
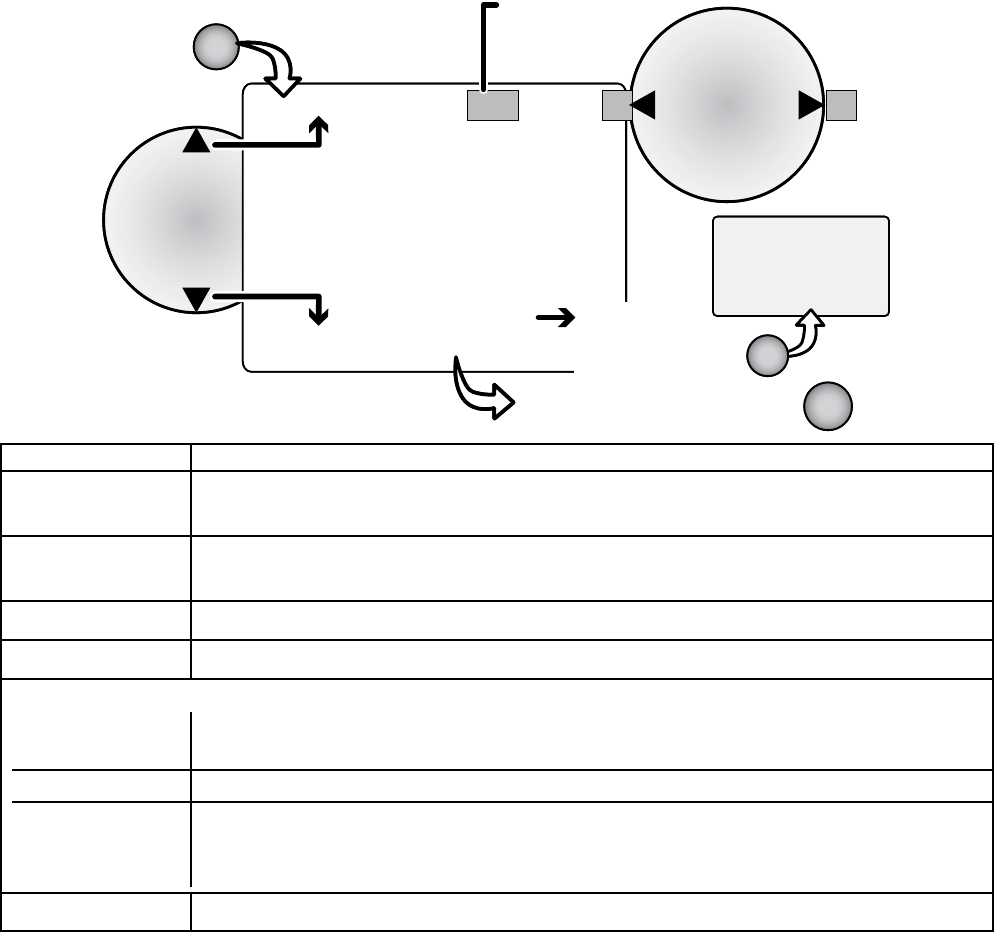
Using the Menu
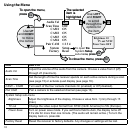
Item Use it to
Audio Vol
Adjust the volume of the audio from the camera. Choose a value from
0
(off)
through
20
(maximum).
Scan Time
Set the length of time the receiver spends on each active camera during a scan
(see page 15) or activate quad display (see page 16).
CAM1
–
CAM4
Turn each of the four camera channels
On
(enabled) or
Off
(disabled).
Pair CAM
Pair a camera to the selected channel (see page 13).
System Setup
sub-menu
Brightness
Adjust the brightness of the display. Choose a value from
1
(min) through
15
(max).
TV out
Change the video output format from
NTSC
(North America) to
PAL
(Europe).
Power Save
Turn on power save mode. If you set this to field to
Auto
, the display turns off
if it’s idle for more than one minute. (The audio will remain active.) To turn the
display back on, press
OK
.
Factory Reset
Reset the receiver to factory defaults. Any changes or settings will be lost.
OK
Audio Vol
Scan Time
CAM1
CAM2
CAM3
CAM4
Pair CAM
System
Factory
10
OFF
ON
ON
ON
ON
1 2 3 4
Setup
Reset
Brightness
TV out
Power Save
10
NTSC
OFF
OK
11
9
OK
To open the menu,
press
The selected
item is
highlighted
Use UP
and DOWN
to move
the cursor
Use LEFT
and RIGHT
to scroll
through the
options for
the item
To close the menu, press
To open the
System Setup
sub-menu, press
OK
Audio Vol
Scan Time
CAM1
CAM2
CAM3
CAM4
Pair CAM
System
Factory
10
OFF
ON
ON
ON
ON
1 2 3 4
Setup
Reset
Brightness
TV out
Power Save
10
NTSC
OFF
OK
11
9
OK
To open the menu,
press
The selected
item is
highlighted
Use UP
and DOWN
to move
the cursor
Use LEFT
and RIGHT
to scroll
through the
options for
the item
To close the menu, press
To open the
System Setup
sub-menu, press


