


d. Downloaded images will be stored to your computer’s hard drive, where you
can later print them out, edit them in imaging software, and even email
them.
e. The camera’s digital output connector will automatically transmit data at
varying baud rates, depending upon the capabilities of your computer. If the
camera, while attached to your computer, remains inactive for a given length
of time, it shuts down automatically.
Note: When downloading your images, make note of where they are being saved.
Record the “path” to the directory or folder where your images are being saved.
This is an essential key to finding your images again.
Connecting a digital camera to a PC is perhaps the most challenging (sometimes-
frustrating) aspects of consumer digital imaging today. If your camera and PC
will not connect then your serial ports must be examined. You can inspect your
computers ports using the device Manager Tab of the Windows (Start, Settings,
Control Panel, System, Device Manager.) For assistance in enabling or setting
your ports, consult your PC system manual or manufacturer. In some cases,
changes may need to be made to your System BIOS. Please consult a knowledgeable
PC expert before attempting any such changes or modifications.
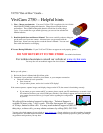
Video Interface –
The ViviCam 2750 is capable of two types of output. In addition to the PC
connection described above, you may also connect to a TV/monitor with NTSC. On
the left side of the camera you will find three ports: NTSC video output, serial
digital data output, and DC IN (6 VDC input).
The video output connector allows you play stored images (640x480), or live
video to a standard television monitor. Note, however, when the LCD monitor is
off, the camera will not output video via this port. To transmit stored images
to your television or VCR attach the yellow-moulded end of the video cable to
the video port of the digital camera, attach the other end to the “Video In”
port on your television or VCR, and power on the camera and turn the on the LCD.
Refer to your TV or VCR manuals for specific details on making a video
connection to your video-ready device.
Appendix 1: LCD Icons
The following is a summary definition of the information icons that may appear
on the LCD image display.
Fill Flash (Always on)
No Flash
Auto Flash
Self-Timer on
Full battery power
Half battery power
Low battery power
Locked file (cannot be erased)
Fine/High Quality mode