VIVOTEK - A Leading Provider of Multimedia Communication Solutions
User's Manual - 7
3. Feed power to the Network Camera and connect it to the Internet. For more information,
please refer to Network deployment on page 9 for details.
4. Install the “Installation Wizard 2“ to assign IP address to the Network Camera. For more
information, please refer to Software installation on page 12 for details.
5. Access to the Network Camera from the Internet. For more information, please refer to
Accessing the Network Camera on page 13 for details.
6. It is suggusted to select Fix Iris in the Audio and Video page (Choose Configuration >
Advanced mode > Audio and video) to set up the iris at the maximum value; then follow the
instustions on the next page to adjust the zoom factor and focus range. Upon completion,
uncheck this item to enable auto iris.
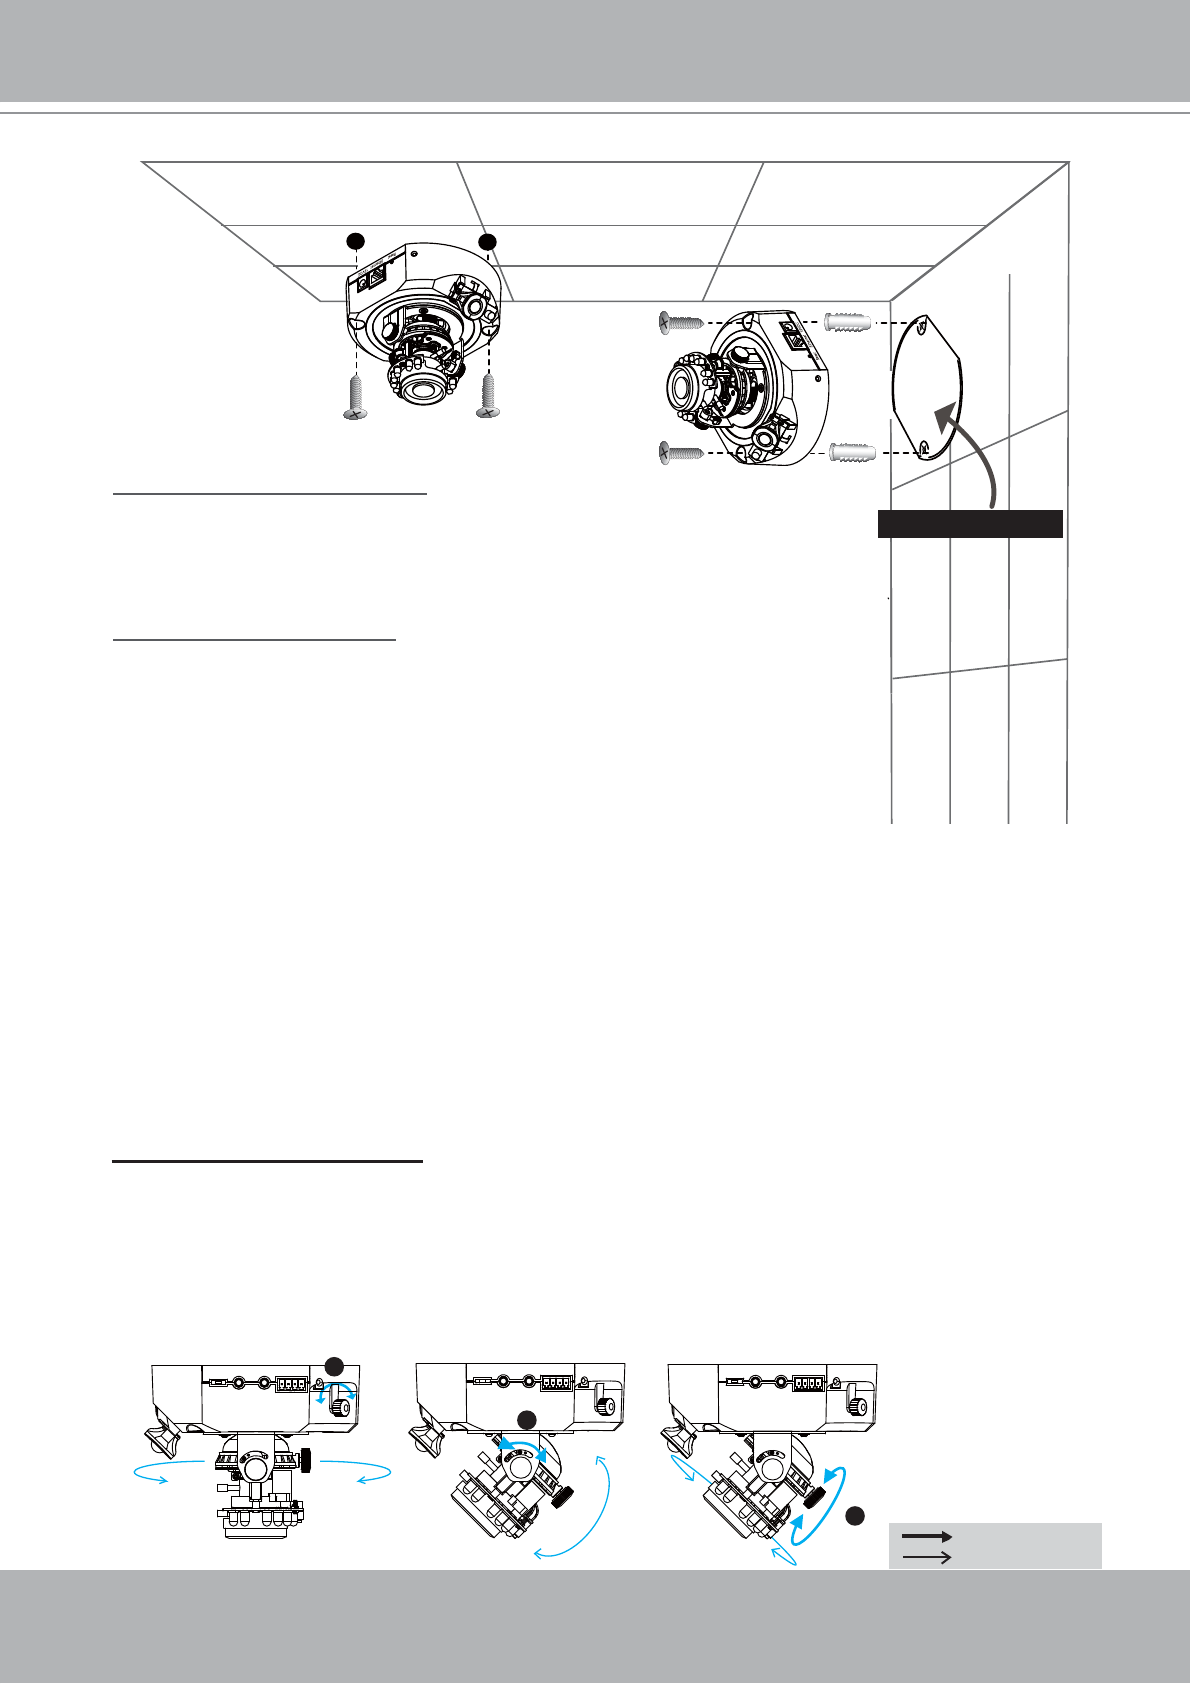
7. Based on the live image retrieved from the camera, adjust the camera lens as following steps.
To adjust the viewing angle
■ Loosen the pan screw and then turn the lens module left and right. Upon completion,
tighten the pan screw.
■ Loosen the tilt screws on both side of the camera and then turn the lens module up and
down. Upon completion, tighten the tilt screws.
■ Loosen the image adjustment screw and then turn the lens to adjust the image orientation.
Upon completion, tighten the image adjustment screw.
Alignment sticker
When mounting to a ceiling
Through the two holes on each side of the camera base,
insert the supplied two screws to corresponding holes and
secure them with a screwdriver.
When mounting to a wall
■ Attach the alignment sticker to the wall.
■ Through the two circles on the sticker, drill two pilot holes into the wall.
■ Hammer the supplied plastic anchors into the holes.
■ Align the two holes on each side of the camera base with the two
plastic anchors on the wall, insert the supplied screws to corresponding
holes and secure them with a screwdriver.
Rotate the screw
Turn the lens
2
3
I/O
Audio Out Mic. In Ext.Int.
1 2 3 4
I/O
Audio Out Mic. In Ext.Int.
1 2 3 4
Audio Out Mic. In Ext.Int.
1 2 3 4
I/O
1
