


Download this book for free at http://www.TheArgusA.com/
59
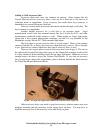
The Pinhole Argus
The Argus camera can be changed into a pinhole camera. But so can a shoebox.
What makes the Argus a better pinhole camera than a shoebox?
1. The Pinhole Argus can easily be converted back into a normal camera with no
permanent damage. But can’t a shoebox still hold shoes? Touché. Nevertheless, read
on.
2. The View Finder can be used to determine what will appear on the negative.
3. With the information in this text, you can roughly determine the exposure time
necessary to take a competent picture. This will save time, effort, and film.
4. The 35mm film transport system allows the use of multiple pictures on normal
35mm film without needing a darkroom to load or unload.
5. The pinhole material can be removed and replaced in the middle of a roll of
film without needing a darkroom.
6. The T(ime) function on the Shutter allows for extremely simple control of
light.
7. A shoe box doesn’t have a tripod socket, which is almost mandatory for a
pinhole camera.
8. The Pinhole Argus is small, portable, and looks like a camera, whereas a
shoebox is big, bulky, and looks like a shoebox.
On this dubious foundation of reasoning, we begin.
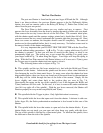
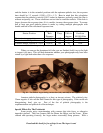
The first step is to unscrew the Lens Assembly. This leaves only the rear-most
lens, which is referred to as the Inside Lens in the last chapter, in the camera.
The Inside Lens is the most difficult lens to remove. Technically, it is unscrewed
from the inside of the Neck. Unfortunately, this lens is screwed-in so tightly that it is
nearly impossible get a good grip on it to remove it. To get at this lens, you must remove
the Shutter from the Neck, using the technique described in Chapter 7. Now that all of
the lenses are removed, reassemble the reattach the Shutter to the Neck.
Cut a piece of aluminum foil into strips 1 1/8
th
inch wide. Color the duller side of
the aluminum foil with a black permanent marker. This black side will face the inside of
the camera.
Now to make the hole that gives the camera its name. Put it exactly in the middle
of the aluminum strip. Place the aluminum foil on a flat surface and use a sewing needle
to make the hole; sewing needles are very sharp and have a gradual slope. You can
control the size of the hole by changing the flat surface you are working on. If you want
a small hole, use a hard surface like metal so that the needle doesn’t penetrate very far
through the surface. If you want a larger hole, use a softer surface, like a Formica kitchen
counter, which will allow the needle to sink into it.
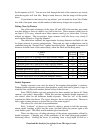
Take the strips (several at a time) and scan them on a computer scanner. There
are two important reasons for this: to confirm that the pinhole is round, and to measure
the size of the pinhole. Making certain that it is round is easy enough. To determine the
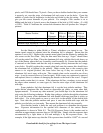
diameter, is a bit trickier. Set the scanner to the maximum scanning resolution, usually
300 to 1200dpi (dots per inch). Scan a ruler or measuring tape, and zoom in on the
picture so that you can see the individual image pixels. If your scanner is set properly,
you should be able to predict the number of pixels between two lines on the ruler that are
1/16
th
of an inch apart. 300dpi should have about 19 pixels, 600dpi should have 38