


13
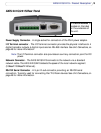
AXIS 241Q/241S - Installation
ARP and Ping in Windows
Assign your product a unique IP address from a computer on your network as follows:
1. Acquire an unused IP address for the AXIS 241Q/241S from your network
administrator.
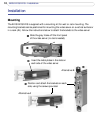
2. Connect the AXIS 241Q/241S to the network using a standard network cable.
3. Locate the serial number (S/N) found on the label on the underside of the AXIS
241Q/241S.
4. From a computer on your network, open a Command Prompt, i.e. from the Windows
Start menu, select Run... and type cmd (command in Windows 98/ME). Click OK.
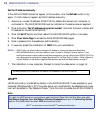
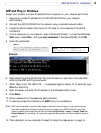
5. Enter the commands:
Syntax:
Example
6. Start/restart the AXIS 241Q/241S. This must be done no later than 2 minutes after
entering the ARP and Ping commands.
7. When ‘Reply from 192.168.0.125: ...’ is displayed (approximately 10-15 seconds), type
Ctrl+C to stop Ping.
8. Start a browser and enter the IP address in the Address/Location field.
9. Press Enter.
10. Enter a password for the root user (administrator).
11. If required, accept the installation of AMC onto your workstation.
Note:
AMC must be installed to view live video images in Microsoft Internet Explorer. If your working environ-
ment restricts additional software components, you can configure your AXIS 241Q/241S to use a Java
applet for updating the images. See the help file under Live View Config > Layout > Default Viewer for
Internet Explorer for information. Or use another supported Web browser, see Technical Specifications, on
page 57.
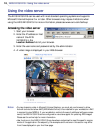
12. The installation is now complete. Proceed to Using the video server, on page 16.
arp -s <IP address> <Serial number>
ping -l 408 -t <IP address>
Note: The ping command is
followed by -l (lower case L)