


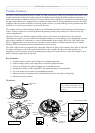


AXIS 225FD - Accessing the Camera
9
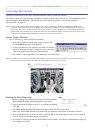
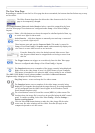
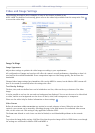
The Live View Page
Depending on whether or not the Live View page has been customized, the buttons described below may or may
not be visible.
The Video Format drop-down list allows the video format on the Live View
page to be temporarily changed.
The Output butt
ons, Pulse and Active/Inactive below, control the output directly from
the Live View page. These buttons are configured under Setup > Live View Config >
Layout.
Pulse -
click this button to activate the output for a defined period of time, e.g.
to switch on a light for 20 seconds.
Active/Inactive - clic
k these buttons to manually start and stop a connected
device, e.g. switch a light on/off.
These buttons start and stop the Seque
nce Mode. This mode is created in
Setup > Live View Config > Sequence mode, and
automatically displays the
view from 2 or more video sources at set intervals.
From the Sou
rce list, select the desired external video source. Note
that Sequence Mode must be stopped before selecting
a source from
this list.
The Trigger buttons c
an trigger an event directly from the Live View page.
These are configured under Setup > Live View Config > Layout.
The Snapshot button saves a snapshot of the image currently being displayed.
Right-click on the
video image to save it in JPEG format on your computer.
This button is intended for use when the AMC viewer toolbar is not available.
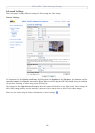
The AM
C (AXIS Media Control) viewer toolbar is available in Microsoft Internet
Explorer only. It displays the following buttons:
Play/Stop button - starts and
stops the live video stream.
The Sn
apshot button saves a snapshot of the video image currently being
displayed. The Snapshot function
and the target directory for saving snapshots
can be configured from the AMC Control Applet in the Windows Control
Panel (Internet Explorer only).
The record button is used to record th
e current (MPEG-4) video stream. The
location where the image file is saved can be specified
using the AMC control
panel. To enable recording, Select Live View Config > Viewer Settings >
Enable recording button.
Click the View Full
Screen button to make the video image fill the entire
screen area. No other windows will be
visible. Press Esc (Escape) on the
computer keyboard to exit full screen.