108
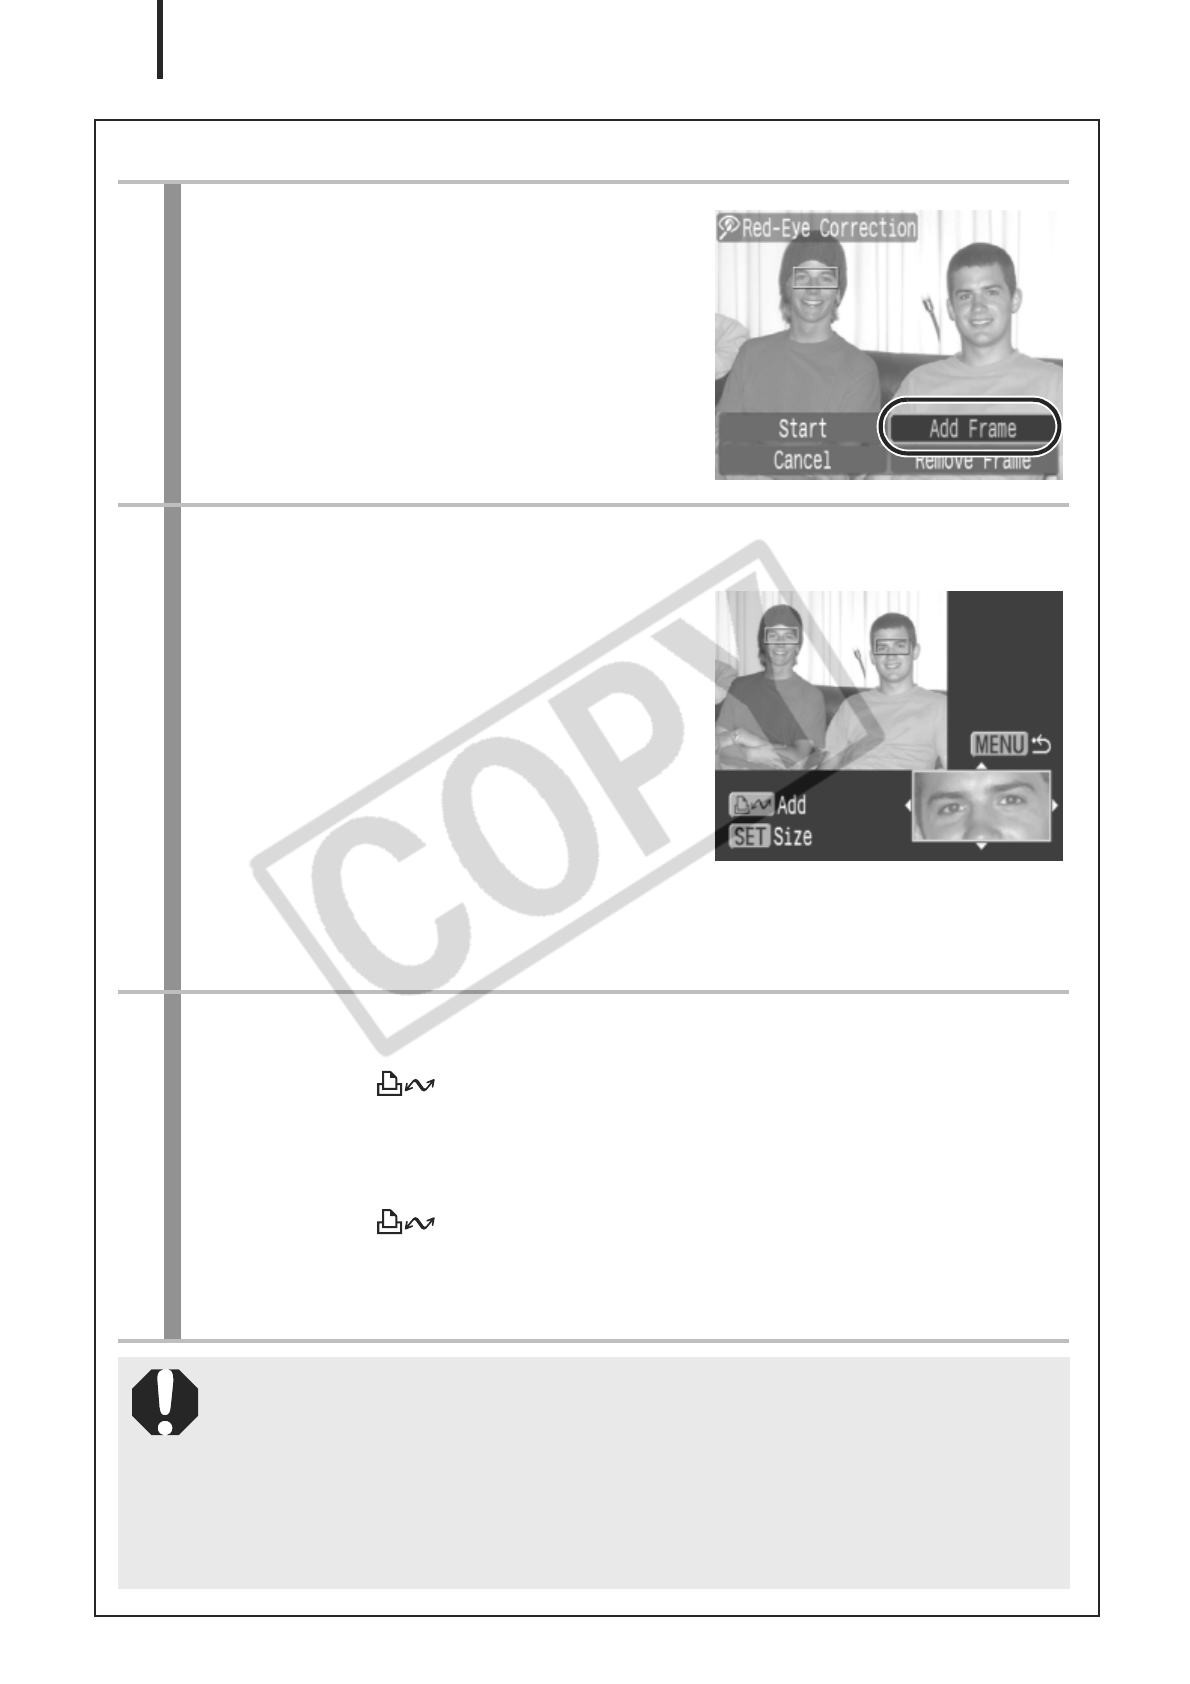
Add Correction Frame
1
Select [Add Frame].
1. Use the W or X button to select
[Add Frame].
2. Press the FUNC./SET button.
• A green frame will display.
2
Adjust the position of the frame.
1. Use the S, T, W or X button to
move the frame.
• Press the FUNC./SET button to
switch to the Frame Size Change
mode and you can change the
size of the frame with the S or T
buttons. Press the FUNC./SET
button again to restore the Frame
Shift mode, allowing you to adjust the position of the
correction frame.
3
Add a correction frame.
1. Press the button.
• The correction frame will be added and the frame color will
change to white.
• Press the button to add additional frames.
• Up to 35 frames may be added.
• Press the MENU button to finish adding correction frames.
To correctly perform red-eye correction, please note the
following (refer to the image in Step 2 above):
- Adjust the correction frame size so that it only surrounds
the red-eye portion to be corrected.
- When there are several subjects with red-eye, be sure to
add one correction frame per subject.


