


109
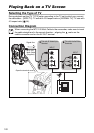
External Connections
Connecting to a Computer
E
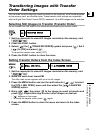
Creating Backup Copies of your DVD
You can create a backup copy of your finalized disc on a common (12 cm) DVD disc.
Even if your computer does not have a DVD drive with writing capabilities, you can use
the camcorder itself to create a backup disc on an 8 cm Mini DVD disc.
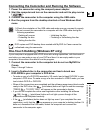
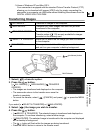
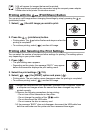
1. Connect the camcorder to the computer and run MyDVD for Canon as
previously described ( 107).
2. Insert a finalized disc in the camcorder and load a brand new media in
your computer’s DVD drive.
• To make a copy of a DVD-RW recorded in VR mode, load a blank DVD-RW in your
computer’s DVD drive. To make a copy of a DVD-R or DVD-RW recorded in VIDEO
mode, you can load a blank DVD-R or DVD-RW.
• You can also use a fully erased DVD-RW disc instead of a brand new media.
However, depending on the condition of the disc, the operation will take longer. To
fully erase a DVD-RW disc you will need DVD authoring/mastering software installed
in your computer.
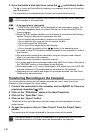
3. Click on the “Make a Backup DVD” option in the New Project tab.
4. Select the camcorder as the “Device to read from”.
5. Select the computer’s DVD drive (with writing capabilities) as the
“Device to write to”.
If your computer is not equipped with a DVD drive with writing capabilities, select the
camcorder also as the “Device to write to”.
6. Click on the “Copy” button and follow the indications on the screen.
• When the “Your disc was created successfully” screen appears, click on “OK” to
finish the task and eject the backup disc.
• When the “Please insert a blank or rewritable DVD into the DVD drive” dialog box
appears, if the tray of a DVD drive other than the one selected in step 5 is ejected,
click on “Cancel” and start again from step 4. If this happens and the source disc is a
DVD-RW disc, some recordings on the source disc might be lost.