


118
Selecting Print Settings
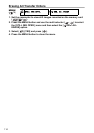
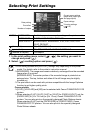
1. In the print setting menu, select ( , ) the setting you want to
change and press ( ).
2. Select ( ) a setting option and press ( ).
Print setting options and [DEFAULT] settings vary depending on the printer
model. For details, refer to the printer’s instruction manual.
[BORDERED]: The image area remains relatively unchanged from the recorded
image when it is printed.
[BORDERLESS]: The center portion of the recorded image is printed at an
enlarged size. The top, bottom and sides of the still image may be slightly
trimmed out.
The print effect can be used with printers compatible with the Image Optimize
function to get higher quality prints.
Canon printers:
[VIVID], [VIVID+NR] and [NR] can be selected with Canon PIXMA/SELPHY DS
printers.
When selecting [2-UP], [4-UP], [9-UP] or [16-UP] for [PAGE LAYOUT], set the
[PAPER SIZE] to [10 x 14.8 cm] or [9 x 13 cm]. Canon PIXMA/SELPHY DS
printers: You can also print on the specially designed Photo Stickers sheets.
When selecting [8-UP], set the [PAPER SIZE] to [CREDITCARD]. Canon
PIXMA/SELPHY CP printers: You can also print on the specially designed
Photo Stickers sheets.
PAPER PAPER SIZE Available paper sizes vary depending on the printer model.
PAPER TYPE PHOTO, FAST PHOTO, DEFAULT
PAGE LAYOUT BORDERLESS, BORDERED, 2-UP, 4-UP, 8-UP, 9-UP,
16-UP, DEFAULT
(date print) ON, OFF, DEFAULT
(print effect) ON, OFF, VIVID, NR, VIVID+NR, DEFAULT
(number of copies) 1-99 copies
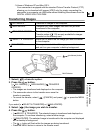
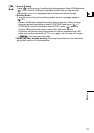
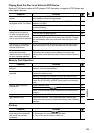
Current paper settings
(paper size, paper type
and page layout)
Paper settings
Trimming settings
( 119)
Date printing
Print effect
Number of copies