


126 External Connections
• To convert all the scenes recorded
on a specific date, select the index
page that contains scenes from
that date.
• From this index page, you can
proceed to step 4 or press Z
and skip to step 6.
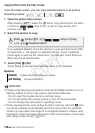
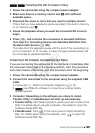
4 Touch [Edit] and then [Convert
HD9SD].
5 Touch the desired option.
• If you selected [Select], touch the
scenes to convert and then touch [OK]. A checkmark O will appear
on selected scenes. Touch a selected scene again to remove the
checkmark. You can also touch [Remove All] to remove all
checkmarks.
• If a copyright notice appears, read it carefully and touch [OK] if you
agree.
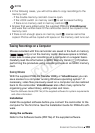
6 Touch [Next] 8 [START].
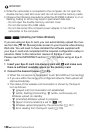
• Before touching [Next], you can touch [5] to change the conversion
settings as described below.
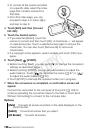
• Before touching [START], you can add decorations or adjust the
audio balance. Touch [ ] to decorate the scene (0 97) or [ ]
to adjust the audio balance (0 52).
• Touch [STOP] to interrupt the operation while it is in progress.
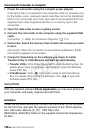
7 When the conversion is completed, a confirmation screen will
appear.
Connect the camcorder to the computer at this point (0 129) to
continue uploading the converted videos to the Web or touch [End
Without Connecting] to connect to the computer later.
Options
[Date] Converts all scenes recorded on the date displayed on the
control button.
[Select] Converts all scenes that you select.
[All Scenes] Converts all scenes.
COPY