


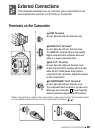

External Connections 105
Using the software
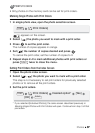
1 Power the camcorder with the compact power adapter.
2 Set the camcorder to mode, in single photo view.
3 Connect the camcorder to the computer using the supplied USB
cable.
• Connection . Refer to
Connection Diagrams
( 102).
•If the device selection screen appears, select [Computer/Printer] and
press .
4 Save the photos onto the computer.
Refer to
Downloading Still Images to the Computer
.
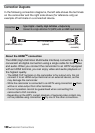
IMPORTANT
• When the camcorder is connected to the computer, do not open the
memory card slot cover and do not remove the memory card.
• Operation may not work correctly depending on the software and the
specifications/settings of your computer.
•If you wis h to use the image files on your computer, make copies of
them first. Use the copied files, retaining the originals.
•Observe the following precautions while the ACCESS indicator is on or
flashing. Failing to do so may result in permanent data loss.
- Do not open the memory card slot cover.
-Do not disconnect the USB cable.
- Do not turn off the camcorder or the computer.
- Do not change the camcorder’s operating mode.
NOTES
• Refer also to the computer’s instruction manual.
• Users of Windows 7, Windows Vista, Windows XP and Mac OS X:
Your camcorder is equipped with the standard Picture Transfer Protocol
(PTP) allowing you to transfer photos (JPEG only) simply by connecting
the camcorder to a computer using the supplied USB cable, without
having to install the supplied software Photo Application.
• If you have no intention to use the optional DW-100 DVD Burner, you
can set or [USB Connection Type] to [ Computer/Printer]
so the selection screen does not appear every time you connect the
camcorder to a computer.
• If you connect the camcorder to the computer while it is set to
mode, the process of creating scene thumbnails will start automatically.
4
PHOTO