


39
Recording Movie Images and Audio
Recording Movie Images and Audio
1. Configure the quality setting for the movie (page 58).
The length of the movie you can record will depend on the quality setting you
select.
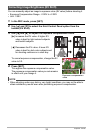
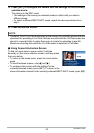
2. In the REC mode, press [BS].
3. Use [8], [2], [4], and [6] to select the »
(Movie) scene and then press [SET].
This causes » to appear on the monitor screen.
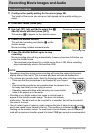
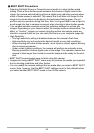
4. Press the shutter button.
This will start recording and display Y on the
monitor screen.
Movie recording includes monaural audio.
5. Press the shutter button again to stop
recording.
Movie recording also will stop automatically if memory becomes full before you
press the shutter button.
• The maximum size allowed for a single movie file is 4 GB. Movie recording
stops automatically when a file becomes 4GB.
NOTE
• Spending a long time using movie recording will cause the camera to become
slightly warm to the touch. This is normal and does not indicate malfunction.
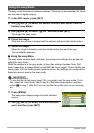
• The camera also records audio. Note the following points when shooting a movie.
– Take care that the microphone is not blocked by your fingers,
etc.
– Good recording results are not possible when the camera is too
far away from what you are trying to record.
– Operating camera buttons while shooting can cause button
noise to be picked up in the audio.
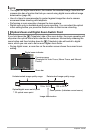
• Shooting a very bright subject can cause a vertical band to
appear in the monitor screen image. This does not indicate
malfunction. The band will not be recorded in a snapshot, but will be recorded in
the case of a movie.
• Use of certain types of memory cards increase the time it takes to record movies,
which can cause movie frames to be lost. This condition is indicated by » and Y
flashing on the monitor screen. To avoid loss of movie frames, use of a memory
card with a maximum transfer speed of at least 10MB per second is recommended.
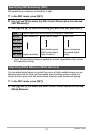
To record a movie
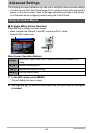
Recording time
Remaining recording time
Microphone