


21
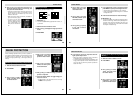
RECORDING
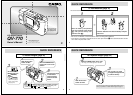
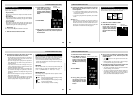
• Viewing the subject on the monitor screen, carefully
compose it within the frames provided on the screen.
• Take care to avoid blocking the lens with your fingers.
• Carefully press the shutter button, taking care not to
move the camera as you do.
• You can view images immediately after you record
them by sliding the Function Switch to the PLAY.
CAUTION
• Never open the battery compartment cover, discon-
nect the AC adaptor from the camera or unplug it from
the wall socket while the “WAIT” message is on the
LCD. Doing so will not only make storage of the cur-
rent image impossible, it can also corrupt other image
data already stored in camera memory.
• Fluorescent lighting actually flickers at a frequency
that cannot be detected by the human eye. When us-
ing the camera indoors under such lighting, you may
experience some brightness or color problems with
recorded images.
NOTE
This camera is equipped with “flash memory” that re-
tains images even when batteries go dead and the AC
adaptor is not connected. Images can be recalled after
new batteries are loaded or the AC adaptor is con-
nected.
Shooting Images Outdoors
Note that strong direct or reflected light can cause vertical
lines in an image. This is due to the characteristics of the
camera’s charge-coupled device (CCD), and it does not indi-
cate malfunction of the camera.
22
RECORDING
IMPORTANT!
• Never use the flash on areas where combustible or
explosive gas is present. Doing so creates the danger
of fire and explosion.
• Never fire the flash in the direction of a person operat-
ing a motor vehicle. Doing so can interfere with the
driver’s vision and create the danger of accident.
• Never fire the flash while it is too close to the subject’s
eyes. Be especially careful with small children. In-
tense light from the flash can cause eye damage if it is
fired too close to the eyes, especially with young chil-
dren. When using the flash, the camera should be at
least one meter (3.3') from the eyes of the subject.
• Make sure that you do not touch or block the flash or
exposure sensor with your fingers. Doing so can soil
these components and interfere with correct flash op-
eration.
• Flash should be used for distances within the range of
about 0.7 meters to 3 meters (2.3' to 9.8'). Flash does
not work well outside this range.
• Depending on operating conditions (type of battery
being used, temperature, etc.), it may take up to 10
seconds for the flash unit to charge.
• The flash does not fire in the following modes: Serial,
Movie, Self-timer (movie or future). The
indicator
flashes to indicate this condition.
• The flash unit will not charge when battery power is
low. The
indicator flashes red to warn you that the
flash will not fire correctly, which may affect exposure
of the image. Replace batteries as soon as possible
when this happens.
• The image on the monitor screen is cleared and the
Charge Lamp flashes while the flash unit is charging.
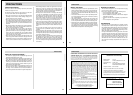
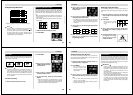
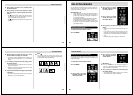
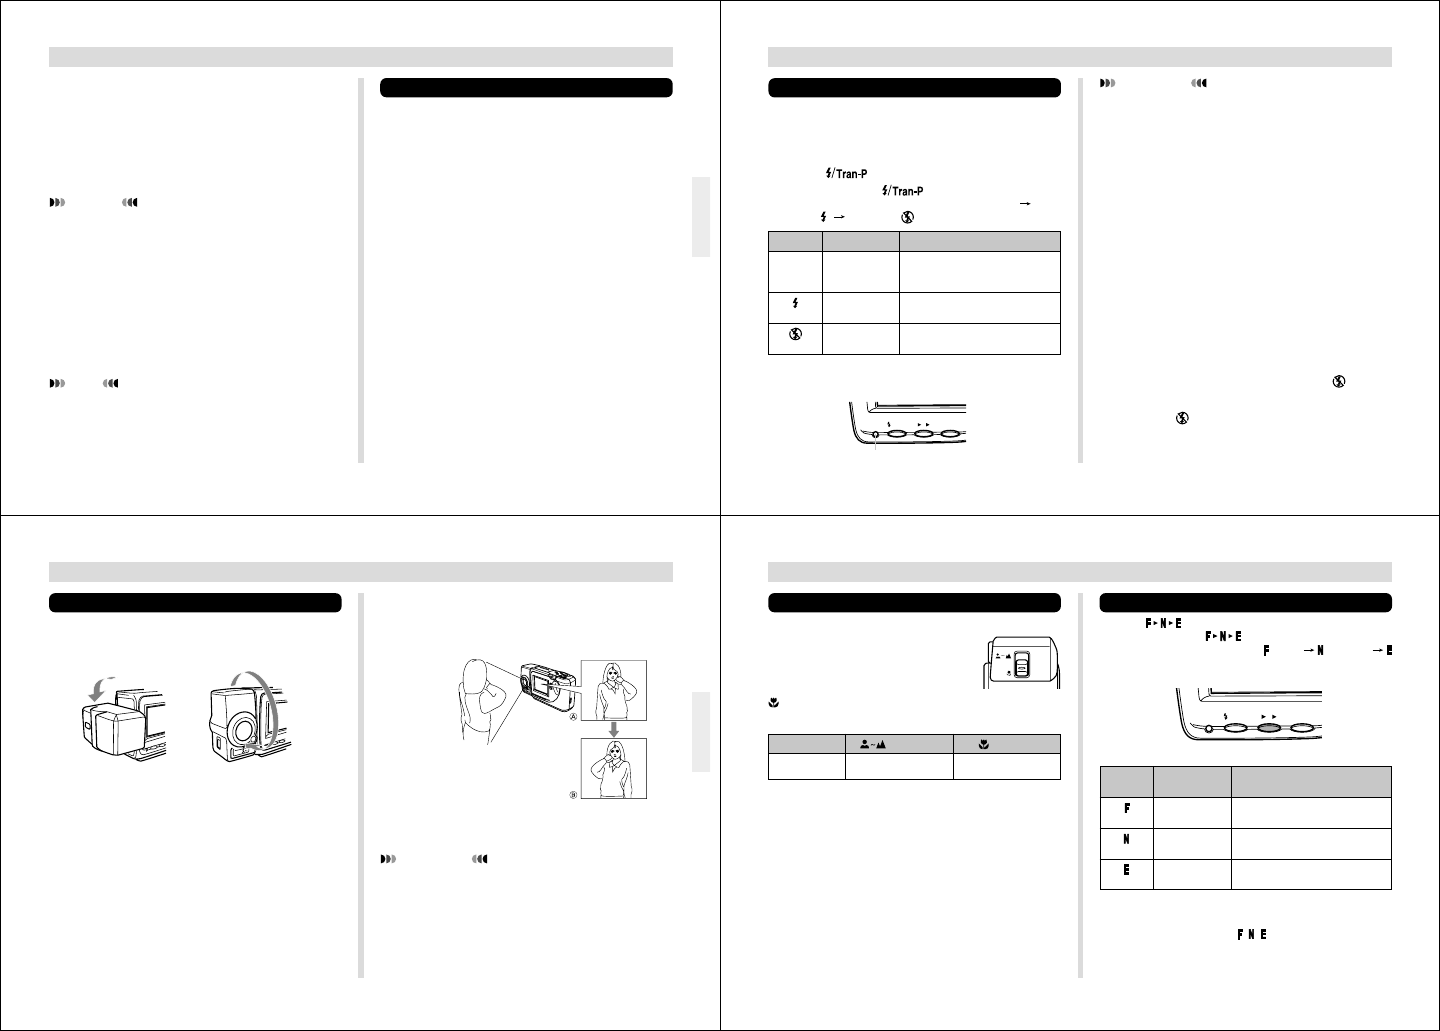
Using the Flash
You can use the built-in flash unit to provide illumination dur-
ing recording. Auto Flash causes the flash to fire automati-
cally whenever the shutter button is pressed while available
light is below a certain level.
1.
Press to select the flash mode.
• Each press of cycles through the flash
modes in the following sequence: Auto Flash
Flash
On “
” Flash Off “ ”.
Indicator
None
Flash Mode
Auto Flash
Flash On
Flash Off
Description
Flash is automatically enabled and
disabled in accordance with expo-
sure conditions.
Flash is always fired, regardless of
exposure conditions.
Flash is never fired, regardless of
exposure conditions.
Charge lamp
MODEFNE
CHARGE
/Tran-P
23
RECORDING
IMPORTANT!
• Do not apply excessive force when rotating the lens
body. Doing so can cause serious damage to the lens.
• Do not carry the camera or move it around while hold-
ing onto only the lens body.
• Return the lens body to its normal position (with the
lens pointing from the front of the camera) before stor-
ing the camera.
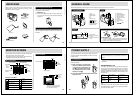
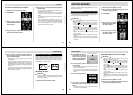
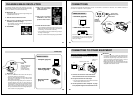
• Any images recorded while the lens body is rotated so the
lens is pointed from the back of the camera are stored as
mirror images of the image that appears in the LCD before
the shutter button is pressed.
A .... LCD when shutter button is
pressed (in the Record
Mode)
B .... LCD when image is played
back from camera memory
Rotates up to 180
°
towards the back
Changing the Lens Orientation
The lens of the camera is built into a lens body that is de-
signed to rotate. This means you can change the angle of
the lens without moving the rest of the camera.
Rotates up to 90
°
towards the front
24
RECORDING
Resolution Settings
Pressing cycles through the available resolution set-
tings. Each press of
cycles through the resolution
setting in the following sequence:
(Fine) (Normal)
(Economy).
Setting
Indicator
Resolution Number of Images
Fine
Normal
Economy
30 (minimum)
(approx. 124KB compressed image)
60 (minimum)
(approx. 62KB compressed image)
120
(approx. 32KB compressed image)
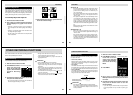
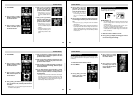
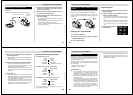
NORMAL/MACRO Switch
The NORMAL/MACRO switch tells the
camera how much distance there will
be between the lens and the object
whose image you are recording. The
following table describes the condi-
tions covered by each switch setting.
is shown on the monitor screen
whenever the macro position is in use.
The above figures indicate the distance from the lens protec-
tion filter to the subject.
Focus Range
(NORMAL)
0.7m ~ ∞
(2.3' ~ ∞)
(MACRO)
14cm ~ 16cm
(5.5" ~ 6.3")
MODEFNE
CHARGE
/Tran-P
• The above figures are approximations only. The actual
number of images depends on image subject matter.
• Up to 120 images (total of
, , images)