26
Receiver
TM
, as well as into a working power outlet.You’ll want to make sure the outlet you have
selected is not a switched outlet (controlled by a light switch). Press the black button on the back
of the Receiver a few times to ensure that the CEIVA
TM
Receiver is not in the lights out mode.
THE RECEIVER DISPLAYS AN ERROR MESSAGE.
If the CEIVA Digital Photo Receiver
TM
is having difficulties performing its dial-in connections
to the CEIVA Network
TM
, it will display a variety of error messages. Here are a few things
you’ll
want to check:
Make sure the phone number in your
Settings (located on your CEIVA
TM
Home Page)
is the actual location from where the CEIVA Digital Photo Receiver
TM
is dialing.
Make sure there is a variety of dial-in numbers (3 different local dial-in numbers are
preferred) in your
Settings section. (NOTE:Toll-Free accounts will only have one number).
Verify that all connections to the CEIVA Digital Photo Receiver
TM
and wall outlets
(both power supply and phone line) are securely plugged in.
Make sure there isn’t anything unnecessary in the
Dialing Prefix (located in your
Receiver Settings) of your Receiver’s account (e.g. A 1, 9, 7 etc.).
For example: If the Dialing Prefix in your Receiver’s account had a 9 in it, your CEIVA Digital Photo Receiver
TM
would
try to dial 9, 515-000-0000.If your phone system doesn’t need a 9 to access a dial tone, this would of course be too
many numbers, and be the cause of a failed connection attempt.
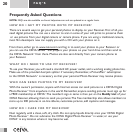
NEED MORE ASSISTANCE?
If you have a computer, take a few minutes to access Customer Care or go directly to the
Help section at help.ceiva.com.The Customer Care section was designed with your time in
mind, providing fast and easy to understand answers to all your questions. It’s a wonderful and
TROUBLESHOOTING
>
>
>
>


