63
3
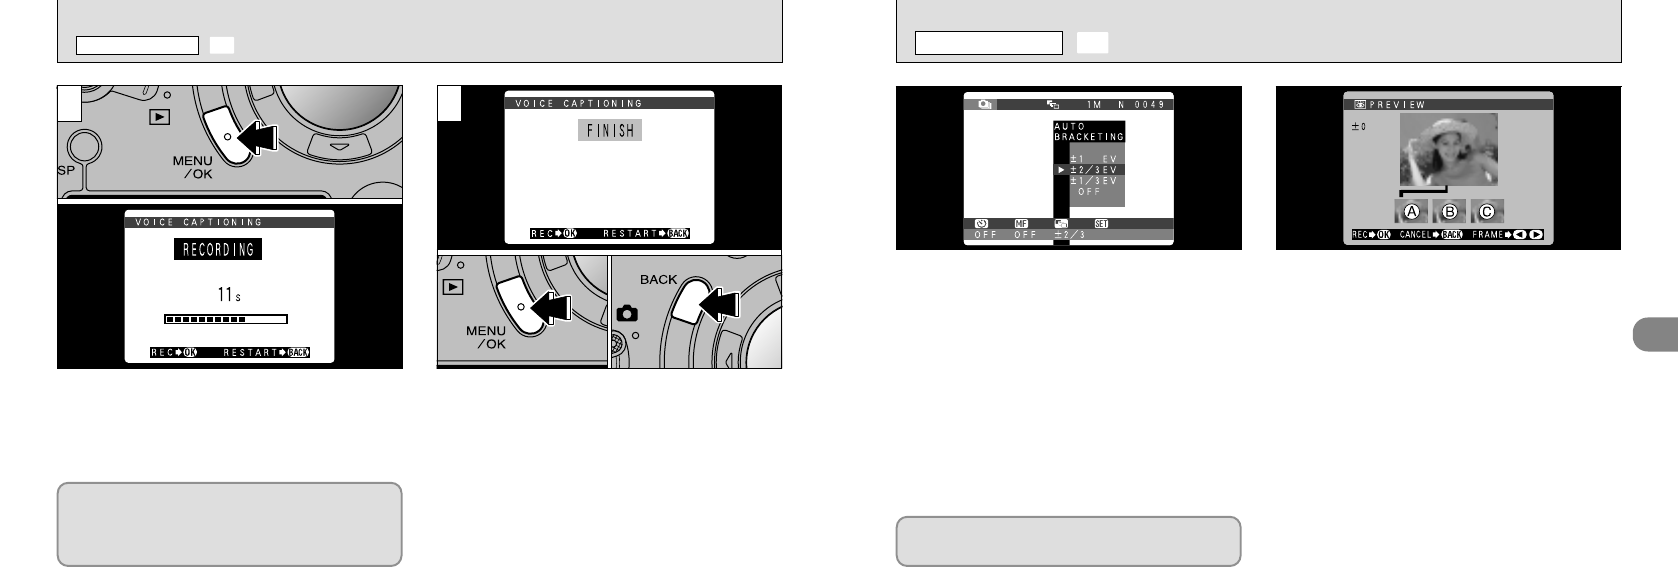
A preview screen appears when you take a
picture. A is correctly exposed, B is overexposed
and C is underexposed. To record the images,
press the “MENU/OK” button. To proceed without
recording the images, press the “BACK” button.
You can also select the image to be recorded.
See P.97 for details.
●
!
Flash photography cannot be used.
●
!
This feature always takes 3 shots. However, if there
is insufficient space on the SmartMedia for 3 shots,
no picture will be taken.
This mode can be selected in the “6” photography
mode.
Use this feature to photograph the same image
with different exposure settings. Auto bracketing
automatically shoots 3 consecutive frames, one
of which is correctly exposed while the remaining
two are underexposed and overexposed
respectively by a set amount.
●
The three available settings are ±1/3, ±2/3 and
±1 EV. See P.126 for a definition of EV.
Five-frames continuous shooting cannot be
used when Auto Bracketing is selected.
●
!
The “STORING” message appears on the LCD
monitor while the images are being recorded onto
the SmartMedia.
●
!
The time required to record a file is approximately 12
seconds in “
GNORMAL” mode.
62
➀
Press the “MENU/OK” button to start
recording the voice memo.
➁
During audio recording, the remaining time is
shown on the LCD monitor and the self-timer
lamp blinks.
3
Face the microphone (➡P.8) on the front of
the camera to record your comment. Hold the
camera roughly 20 cm away for the best
results.
When you have recorded 30 seconds of sound, the
“≠” message appears on the LCD monitor.
To finish: Press the “MENU/OK” button.
To re-record your comment: Press the “BACK”
button.
4
●
!
To end your comment during recording, press the
“MENU/OK” button.
●
➀
●
➁
D VOICE CAPTIONING
PHOTOGRAPHY MODE
|
AUTO BRACKETING
PHOTOGRAPHY MENU


