103
6
102
CONNECTING AT DSC MODE
3 4
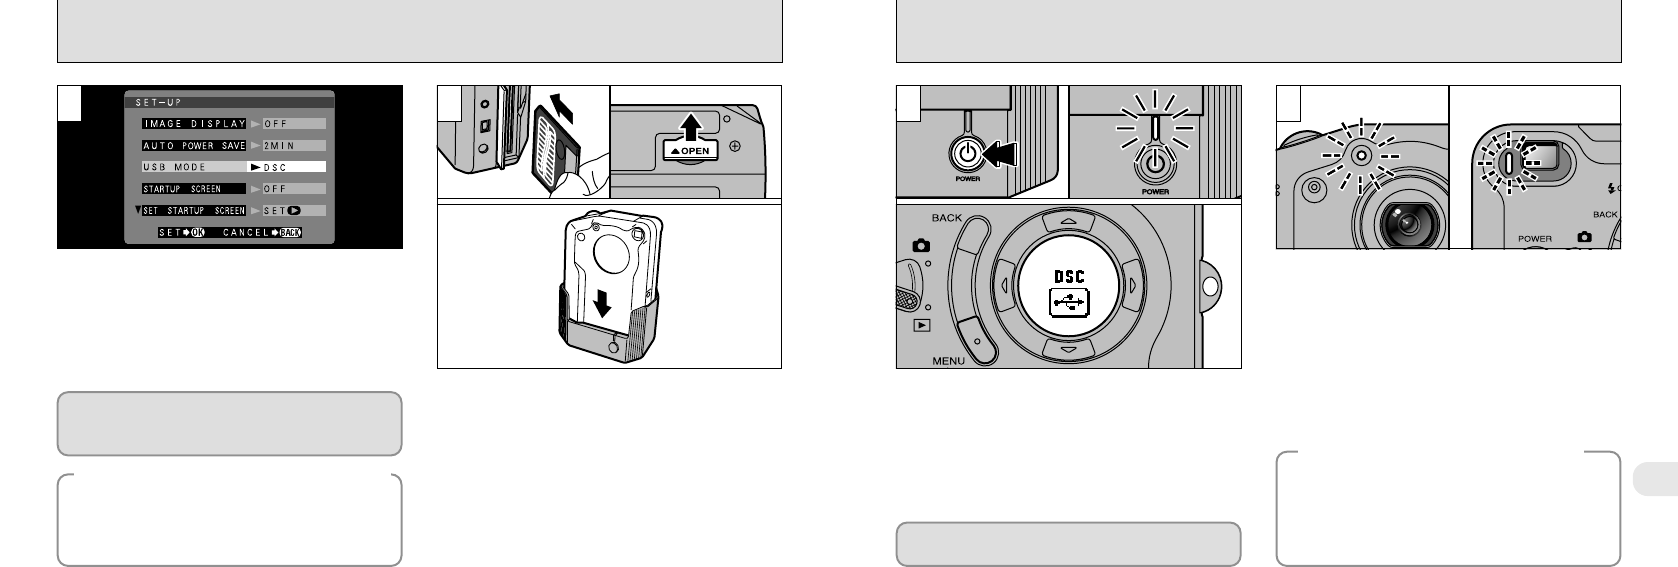
When you press the “<” (power) button on the
cradle, the camera is connected to your PC as a
removable disk drive and the power lamp on the
cradle lights. “DSC” also appears on the display
panel.
The self-timer lamp blinks and the viewfinder
lamp alternately blinks green and orange while
the camera is communicating with your PC. Do
not disconnect the camera during communication.
●
!
See P.106 for information on removing the camera.
●
!
The Auto Power Save function does not operate
when the camera is connected to a PC.
◆
When the Cradle is Not Used
◆
Set the “USB MODE” setting in the “SET–UP”
menu to “DSC”. (➡P.92, 93)
●
!
Check that the AC power adapter and the special
USB cable are connected to the cradle.
1 2
➀
Load a SmartMedia containing photographed
images.
➁
Open the connection socket cover on the
bottom of the camera.
➂
Switch the camera off and place it in the
cradle.
●
!
Push the camera firmly onto the cradle connector.
Connect the special USB cable to the DIGITAL
(USB) socket on the camera and switch the
camera on (➡P.8, 22).
●
!
The AC power adapter should be used when the
camera is connected to a PC (➡P.19).
●
➀
●
➁
●
➂
Install the software by referring to the
Software Quick Start Guide booklet for the
installation procedure.
If Windows driver installation has started, refer
to the Software Quick Start Guide booklet.
◆
If You Do Not Use FinePixViewer
◆
You need QuickTime 3.0 or later or DirectX 8.0
Runtime (for Windows). To play back audio,
use the software provided with your operating
system (Windows and Macintosh).


