


121
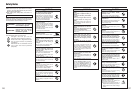
There is speckling on
the image.
The camera does not
emit any sound.
Frame erase does not
erase the frame.
The ERASE ALL
function does not erase
all the frames.
Screens are not
displayed in English.
There is no image or
sound on the TV.
When the camera is
connected to a personal
computer (PC), the
photographed image or
playback image appears on
the camera’s LCD monitor.
Nothing happens when
I use the Mode dial.
The camera no longer
works correctly.
Can’t print with
PictBridge.
The camera was
connected to PC when
the USB mode was set
to “
ˆ
”.
The picture was taken with a slow shutter
speed (long exposure) in a high-
temperature environment.
i The camera volume is set too low.
i The microphone was blocked during
shooting/recording.
i There is something covering the speaker
during playback.
Some frames may be protected.
i A language other than English is
selected in the “ ” setting in
SET-UP (➡P.86).
i The included A/V cable was connected
during movie playback.
i
The camera is not connected to the TV
correctly.
i “TV” is selected as the TV input.
i The video output setting is incorrect.
i The TV volume is turned down.
i The USB cable is not correctly
connected to the PC or camera.
i The PC is not turned on.
i Camera malfunction.
i The battery runs out.
The camera has suffered an unforeseen
problem.
“
ˆ
” is not selected in USB mode in the
SET-UP menu.
This is a characteristic of CCDs and does
not indicate a camera fault.
i Adjust the volume.
i Take care not to block the microphone
during shooting/recording.
i Make sure that the speaker is uncovered.
Unprotect frames using the camera on
which the protection was first applied.
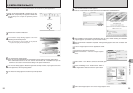
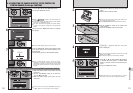
1Press the “MENU/OK” button to display
the menu.
2Press “d” or “c” to select “
F” and press
“a” or “b” to select “SET-UP”. (Press the
“MENU/OK” button to appear the SET-
UP screen on the LCD monitor.)
3Press “d” or “c” to move to option 3 and
then use “a” or “b” to select “ ”.
4Press “d” or “c” several times to select
“ENGLISH”.
5Press the “MENU/OK” button.
i After the movie playback mode is stopped,
connect the camera and TV correctly.
i Connect the camera and TV correctly.
i Set the TV input to “VIDEO”.
i
Change the setting to “NTSC” or “PAL” (➡P.86).
i Adjust the volume.
i Set up the camera and the USB cable
(included) correctly.
i Turn the PC on.
i
Briefly remove the battery or disconnect the
AC power adapter. Then reload the battery or
reconnect the AC power adapter and try again.
i Load a new or fully charged battery.
Briefly remove the battery or disconnect
the AC power adapter. Then reload the
battery or reconnect the AC power adapter
and try again.
If the message still appears,
contact your FUJIFILM dealer.
Select “
ˆ
” in USB mode in the SET-UP
menu.
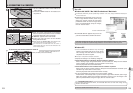
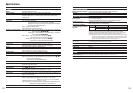
Perform steps
1
to
3
to remove the
camera from PC.
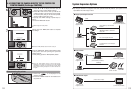
h Windows
1
The “New Hardware Found” wizard (or
“Scanner and Camera” wizard) appears. If the
wizard does not appear, proceed to step
3
.
2
Click the [Cancel] button.
3
Disconnect the camera from the PC.
h Macintosh
1
The window for locating the driver
appears. If the window does not
appear, proceed to step
3
.
2
Click the [Cancel] button.
3
Disconnect the camera from the Macintosh.
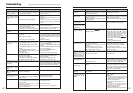
Troubleshooting Possible causes Solutions
120
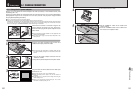
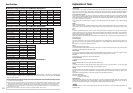
Troubleshooting eIf you think the camera is faulty, check the following once more.
The viewfinder lamp
does not light when
charging the battery.
The viewfinder lamp
blinks during charging
and the battery won’t
charge.
No power.
Power cuts out during
operation.
Battery runs out quickly.
No photograph is taken
when the Shutter button
is pressed.
Can’t use the flash.
The flash settings are
restricted and cannot
be selected.
Can only select
Suppressed flash
mode.
Can only select the
“
1
” and “
¡
” quality
settings.
The playback image is
dark even though the
flash was used.
The image is blurred.
i There is no battery in the camera.
i The camera and AC power adapter are
not connected correctly.
i The battery terminals are dirty.
i The battery gets un-rechargeable.
i The battery has runs out.
i The AC power adapter plug has come
out of the power outlet.
i The battery is loaded backward.
i The battery cover is not closed correctly.
The battery runs out.
i Camera is being used in extremely cold
conditions.
i The terminals are soiled.
i The battery get un-rechargeable.
i No xD-Picture Card is inserted.
i The xD-Picture Card is fully recorded.
i The xD-Picture Card is not formatted.
i The xD-Picture Card contact area is
soiled.
i The xD-Picture Card is damaged.
i The Auto power off function has turned
the camera off.
i The battery runs out.
i The Shutter button was pressed while
the flash was charging.
i The flash is not popped up.
i The Mode dial is set to “
,
” Landscape.
i Continuous shooting is selected.
The Mode dial is set to “
m
”, “
,
”, “
.
” or
“
/
”.
Continuous shooting is selected.
The sensitivity is set to 1600 (high-
sensitivity photography).
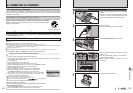
i The subject is too far away.
i Your finger was covering the flash/flash
control sensor.
i The lens is dirty.
i You photographed scenery with Macro
mode selected.
i You took a close-up shot without
selecting Macro mode.
i You are shooting a subject that is not
suited to autofocusing.
i Load the battery.
i Connect the camera and AC power
adapter correctly.
i Take the battery out briefly and then
reload it.
i Wipe the battery terminals with a clean,
dry cloth.
i Load a new battery. If the battery still
fails to charge, contact your FUJIFILM
dealer.
i Load a new or fully charged battery.
i Plug the adapter back in.
i Load the battery in the correct direction.
i Close the battery cover correctly.
Load a new or fully charged battery.
i Put the battery in your pocket or another
warm place to heat it and then load it into
the camera just before you take a picture.
i Wipe the battery terminals with a clean,
dry cloth.
i Load a new battery.
i Insert an xD-Picture Card.
i Insert a new xD-Picture Card or erase
some unwanted frames.
i Format the xD-Picture Card on the
camera.
i Wipe the xD-Picture Card contact area
with a clean dry cloth.
i Insert a new xD-Picture Card.
i Turn the camera on.
i Load a new or fully charged battery.
i Wait until the flash has finished charging
before pressing the Shutter button.
i Pop up the flash.
i Change the Photography mode.
i Set continuous shooting to “OFF”.
The flash settings are restricted because
the camera settings are tailored to the
scene being shot. Change the Photography
mode for a wider range of flash settings.
Set continuous shooting to “OFF”.
Set the sensitivity to 800 or less.
i Move to within the effective flash range
before taking the picture.
i Hold the camera correctly.
i Clean the lens.
i Cancel Macro mode.
i Select Macro mode.
i Use AF/AE lock to take the picture.
Troubleshooting Possible causes Solutions