


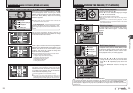
15
Getting Ready
1
14
2
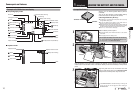
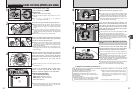
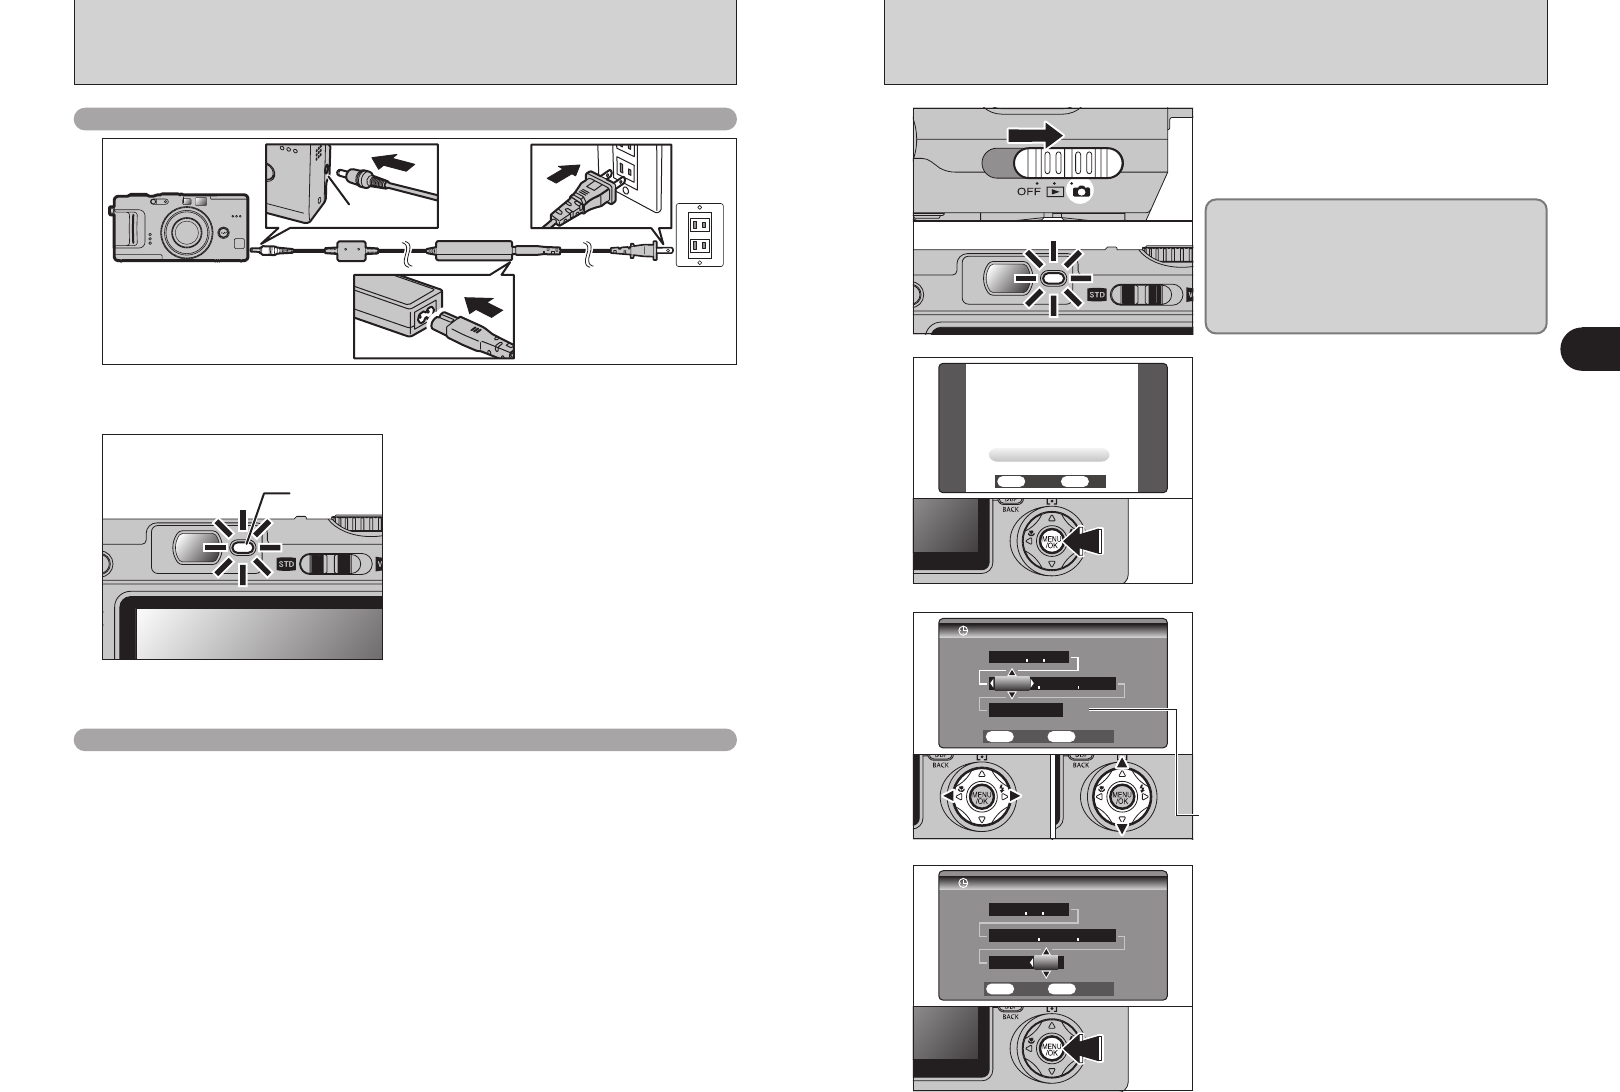
After purchasing the camera, first time when
turning camera on, the date and time are cleared.
Press the “MENU/OK” button to set the date and
time.
●
!
If the message (see figure at left) does not appear, refer to
“Correcting the date and time” (➡P.16) and check and correct
the date and time settings.
●
!
The message also appears when the camera battery has
been removed and the camera has been left for a long
period.
●
!
To set the date and time later, press the “DISP (BACK)”
button.
●
!
If you do not set the date and time, this message will appear
each time you turn the camera on.
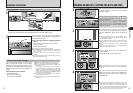
3
4
1Press “d” or “c” to select Year, Month, Day,
Hour or Minute.
2Press “a” or “b” to correct the setting.
Once you have set the date and time, press the
“MENU/OK” button. Pressing the “MENU/OK”
button changes the camera to Photography or
Playback mode.
●
!
Holding down “a” or “b” changes the numbers continuously.
●
!
When the time displayed passes “12:00”, the AM/PM setting
changes.
●
!
At the time of purchase and after leaving the camera for a
long period with the batteries removed, settings such as the
date and time are cleared. Once the AC power adapter has
been connected or the battery has been fitted for 2 hours or
more, the camera settings will be retained for roughly 6 hours
even if both sources of camera power are removed.
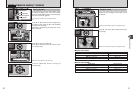
01 02
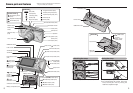
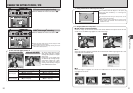
1
Slide the Power switch to turn the camera on and
off. When turning the camera on, the viewfinder
lamp lights (green).
TURNING ON AND OFF / SETTING THE DATE AND TIME
The lens moves when the camera is in “q” mode.
Take care not to obstruct the lens as it is a
precision component.
Obstructing the lens will cause damage and
“
ß” or “∂ ” will appear.
Take care also not to get fingerprints on the
camera lens as this will result in impaired image
quality in your shots.
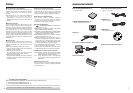
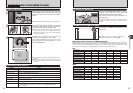
DC IN 5V socket
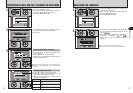
1
2
Check that the camera is turned off. Plug the AC power adapter connector into the DC IN 5V
socket on the camera and then plug the adapter itself into the main power outlet.
The viewfinder lamp lights (red) and battery
charging begins. When charging is completed, the
viewfinder lamp turns off.
h Full recharging times for completely depleted
battery
(At an ambient temperature of +21°C to 25°C
(+70°F to 77°F))
NP-40: Approx. 2 hours
●
!
Charging times increase at low temperatures.
●
!
If the viewfinder lamp blinks during charging, a charging error
has occurred and the battery cannot be charged. If this
occurs, see P.120.
●
!
Turning the camera on during charging interrupts the
charging.
●
!
Use the BC-65 Battery Charger (sold separately) to charge
battery more quickly (➡P.114).
Lit red
CHARGING THE BATTERY
Charging battery without Cradle
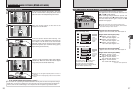
Using the AC Power Adapter
Use the AC power adapter to avoid losing
power at inconvenient times, such as when
downloading photographed images to the
computer. You can take pictures and play back
images without worrying about depleting the
battery.
h Compatible AC power adapters
AC-5VW (included)
AC-5VH (sold separately)
AC-5VHS (sold separately)
●
!
Always use the FUJIFILM products listed on the left.
●
!
See P.116 for notes on using the AC power adapter.
●
!
Only connect or disconnect the AC power adapter when
the camera is off.
Connecting or disconnecting the AC power adapter
while the camera is on temporarily interrupts the power
supply to the camera, so that images or movies being
shot are not recorded. Failing to turn the camera off first
can also result in damage to the xD-Picture Card or
malfunctions during PC connection.
●
!
The socket-outlet shall be installed near the equipment
and shall be easily accessible.
●
!
The shape of the plug and socket-outlet depends on the
country of use.