


105
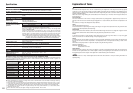
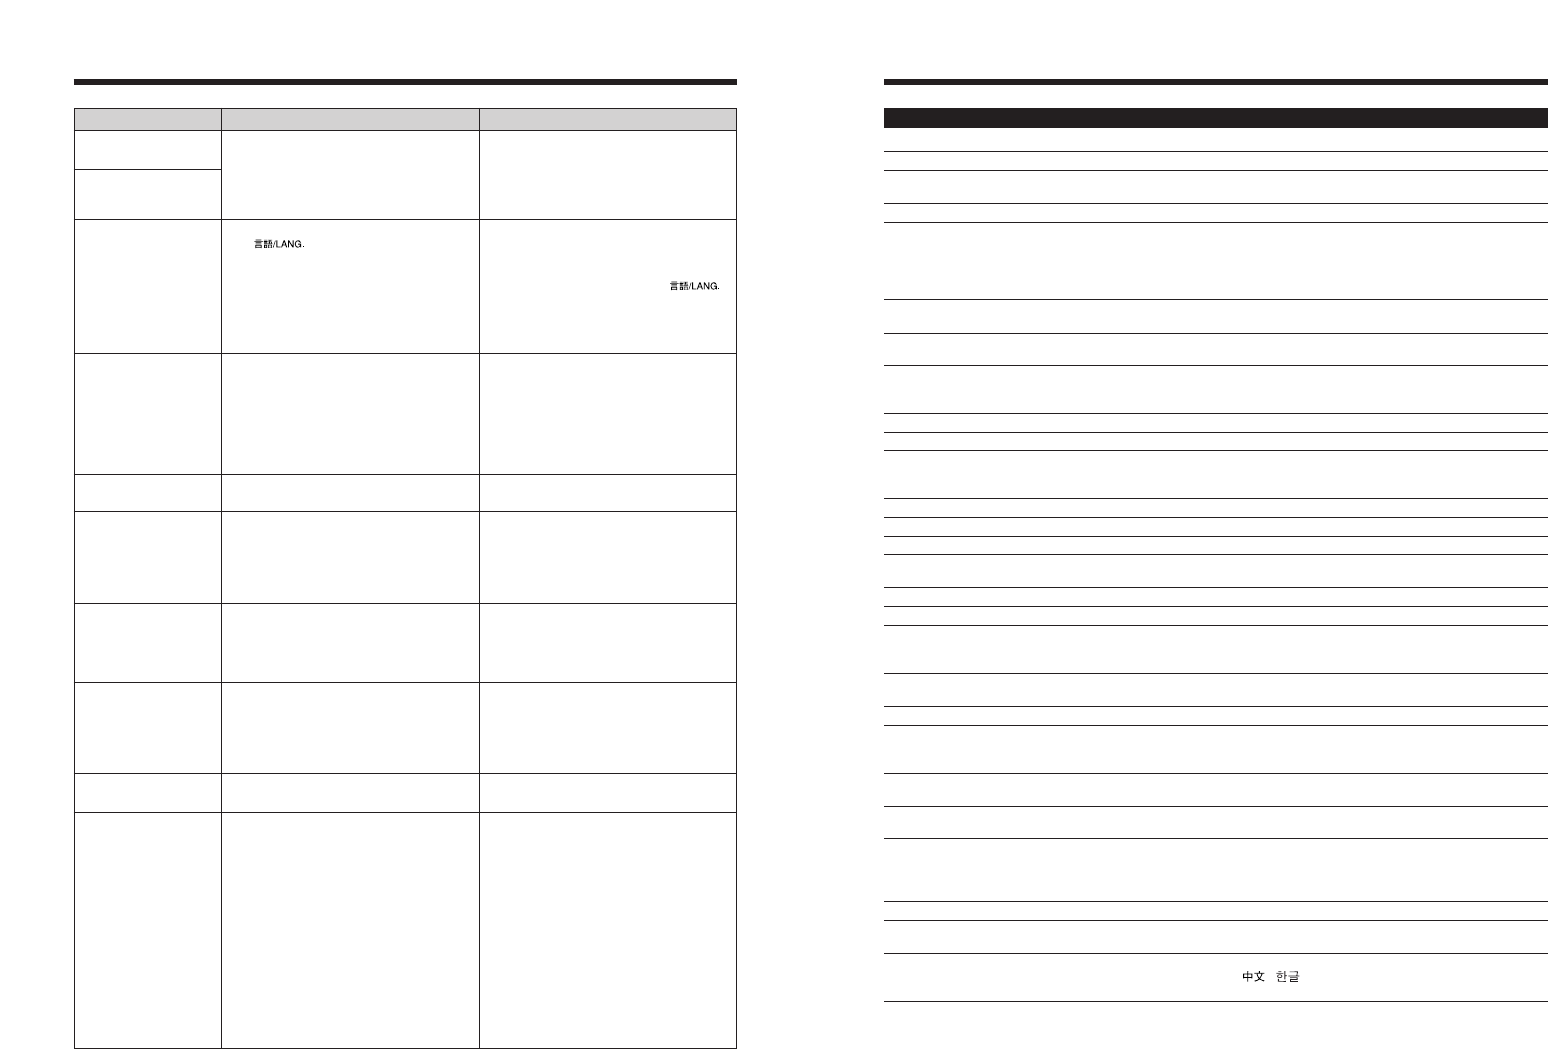
Model Digital camera FinePix Z1
Effective pixels 5.1 million pixels
CCD 1/2.5-inch Super CCD HR
Number of total pixels: 5.22 million pixels
Storage media xD-Picture Card (16/32/64/128/256/512 MB/1 GB)
File format Still image: DCF-compliant
Compressed: Exif ver.2.2 JPEG, DPOF-compatible
✽ Design rule for Camera File System compliant DPOF compatible
Movie: AVI format, Motion JPEG
Audio: WAVE format, Monaural sound
Number of recorded pixels Still image: 2592 × 1944 pixels/2736 × 1824 pixels/2048 × 1536 pixels/
1600 × 1200 pixels/640 × 480 pixels (
÷
/
„
/
3
/
2
/
`
)
Lens Fujinon 3× optical zoom lens
F3.5-F4.2
Focal length f=6.1 mm-18.3 mm
(Equivalent to approx. 36 mm-108 mm on a 35 mm camera)
(
„
: Equivalent to approx. 38 mm-114 mm on a 35 mm camera)
Digital zoom Approx. 5.7× (3× optical zoom lens is used together: Max. zoom scale: 17.1×)
Aperture (Wide-angle) F3.5/F5/F8 3 steps
Focal range Normal: approx. 60 cm (2.0ft.) to infinity
Macro: approx. 8 cm (3.1 in.) to 80 cm (2.6 ft.) (wide-angle)
approx. 45 cm (1.5 ft.) to 80 cm (2.6 ft.) (telephoto)
Sensitivity AUTO/Equivalent to ISO 64/100/200/400/800
Photometry TTL 64-zones metering
Exposure control Program AE
Scene position
À
(NATURAL LIGHT),
m
(PORTRAIT),
,
(LANDSCAPE),
.
(SPORT),
©
(NIGHT)
Exposure compensation –2 EV to +2 EV in 1/3 EV-step increments (
s
)
Shutter speed 4 sec. to 1/1000 sec. (depend on Exposure mode)
Focus Mode: Auto focus
AF system: TTL contrast-type
AF frame selection: AF (CENTER), AF (MULTI)
White balance Automatic scene recognition/Preset (Fine, Shade, Fluorescent (Daylight),
Fluorescent (Warm White), Fluorescent (Cool White), Incandescent)
Self-timer Approx. 10 sec./2 sec.
Flash type Auto flash
Effective range (AUTO): Wide-angle: approx. 30 cm-3 m (1.0 ft.-9.8 ft.)
Telephoto: approx. 60 cm-2.3 m (2.0 ft.-7.5 ft.)
Flash mode Auto, Red-Eye Reduction, Forced Flash, Suppressed Flash, Slow Synchro,
Red-Eye Reduction + Slow Synchro
LCD monitor 2.5 inches, Aspect ratio: 4:3; approx. 115,000 pixels Amorphous silicon TFT,
Approx. 100% coverage
Movie 640 × 480 pixels/320 × 240 pixels (
%
/
$
)
(30 frames per second with monaural sound)
A series of continuous image can be recorded up to available recording time per
xD-Picture Card. Zoom cannot be used during movie recording.
Photography functions High-speed shooting, Best framing, Post shot assist window, Frame No. memory
Playback functions Trimming, Image rotate, Automatic playback, Multi-frame playback, Sorting by
date, Voice memo
Other functions PictBridge, Exif print, PRINT Image Matching
II
, Language (English, Francais,
Deutsch, Español, Italiano, , ), World time (Time difference), FinePix
photo mode (p-mode)
Specifications
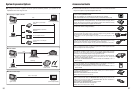
System
104
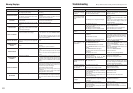
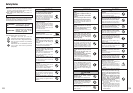
Troubleshooting Possible causes Solutions
Frame erase does not
erase the frame.
The ERASE ALL
function does not erase
all the frames.
Screens are not
displayed in English.
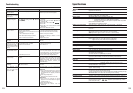
There is no image or
sound on the TV.
The TV image is black
and white.
When connecting the
camera to a PC, the
photographed image or
playback image appears
on the camera’s LCD
monitor.
Nothing happens when
using the Mode switch.
The camera no longer
works correctly.
Can’t print with
PictBridge.
The camera was
connected to a PC
when the USB mode
was set to “
®
”.
Some frames may be protected.
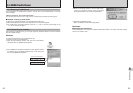
A language other than English is selected in
the “ ” setting in the “
˜
” SET-UP
menu (➡P.74).
i The included A/V cable was connected
during movie playback.
i The camera is not connected to the TV
correctly.
i “TV” is selected as the TV input.
i The video output setting is incorrect.
i The TV volume is turned down.
The video output setting is incorrect.
i The USB cable (mini-B) is not correctly
connected to the PC or cradle.
i The PC is not turned on.
i Camera malfunction.
i The battery has run out.
The camera has suffered an unforeseen
problem.
“
®
” is not selected in USB mode in the
“
˜
” SET-UP menu.
Unprotect frames using the camera on
which the protection was first applied.
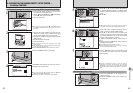
1Press the “MENU/OK” button to display
the menu.
2Press “
a
” or “
b
” to select “
˜
” SET-UP
and press “
c
”.
3Press “
a
” or “
b
” to select “
ô
” .
4Press “
c
”.
5Press “
a
” or “
b
” several times to select
“ENGLISH”.
6Press the “MENU/OK” button.
i After the movie playback mode is stopped,
connect the camera and TV correctly.
i Connect the camera and TV correctly.
i Set the TV input to “VIDEO”.
i Change the setting to “NTSC” or “PAL”
(➡P.74).
i Adjust the volume.
Change the setting to “NTSC” or “PAL”
(➡P.74).
i Set up the camera, and connect the USB
cable (mini-B) correctly.
i Turn the PC on.
i Briefly remove the battery or disconnect
the AC power adapter and cradle. Then
reload the battery, or reconnect the AC
power adapter and cradle, and try again.
i Load a new or fully charged battery.
Briefly remove the battery or disconnect the
AC power adapter and cradle. Then reload
the battery, or reconnect the AC power
adapter and cradle, and try again. If the
message still appears, contact your
FUJIFILM dealer.
Select “
®
” in USB mode in the “
˜
” SET-
UP menu.
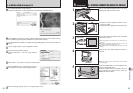
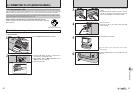
Perform steps 1 to 3 to remove the
camera from the PC.
h Windows
1 The “Found New Hardware” wizard or
“Scanner and Camera” wizard appears. If
the wizard does not appear, proceed to
step
3
.
2
Click the [Cancel] button.
3
Disconnect the camera from the PC.
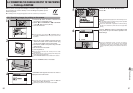
h Macintosh
1
The window for locating the driver
appears. If the window does not appear,
proceed to step
3
.
2
Click the [Cancel] button.
3
Disconnect the camera from the
Macintosh.
Troubleshooting