


24 25
Basic Photography
2
Click
Bebeep
1
4
3
2
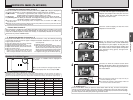
Quality mode
Image Date Size
DPC-16 (16MB)
DPC-32 (32MB)
DPC-64 (64MB)
DPC-128 (128MB)
Approx. 2.4MB Approx. 1.2MB
3 6M • F 3 6M •N
147
443
53
26
13
6
311
938
113
56
28
13
Number of recorded pixels
2832 × 2128 640 × 480
26
53
107
215
49
99
198
398
122
247
497
997
Approx. 590KB
Approx. 320KB Approx. 130KB
589
1729
1119
3285
2729
8213
Microdrive 340MB
Microdrive 1GB
2048 × 1536 1280 × 960
2 3M 1 1M
!
0.3M
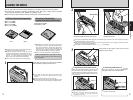
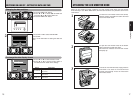
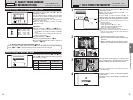
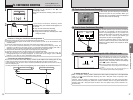
Number of Available Frames
The number of available shots is displayed on
the screen.
●
!
See P.34 for information on changing the quality mode.
●
!
The default quality mode “y” set at shipment is 1.
h Very shiny subjects such as a mirror or car body.
h Subjects photographed through glass.
h Subjects that do not reflect well, such as hair or fur.
h
Subjects with no substance, such as smoke or flames.
h When the subject is dark.
h When there is very little contrast between the
subject and the background (such as white
walls or subjects dressed in the same color as
the background).
h Subjects moving at high speed.
h When something other than your subject is close to
the AF frame, has contrasting areas of light and
dark and is either closer or further away than your
subject (as when you photograph someone against
a background with strongly contrasting elements).
For subjects of this type, use AF/AE lock (➡P.25).
◆
Subjects Not Suitable for Autofocus
◆
Though the FinePix M603 uses an accurate autofocus mechanism, it may have difficulty focusing
or not be able to focus at all on the types of subject and situation listed below. In such cases, the
image may be out of focus.
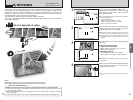
✽ Number of available shots displayed for a new media formatted on the camera.
■ Standard Number of Shots for the Media
Because the amount of data needed to record an image varies slightly depending on the type of subject, the number of
available shots may not decrease after an image is recorded, or may decrease by 2 in some cases. Also, the difference
between the standard number of shots and the actual number of available shots increases for media with a higher capacity.
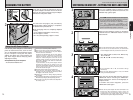
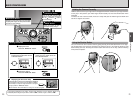
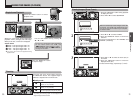
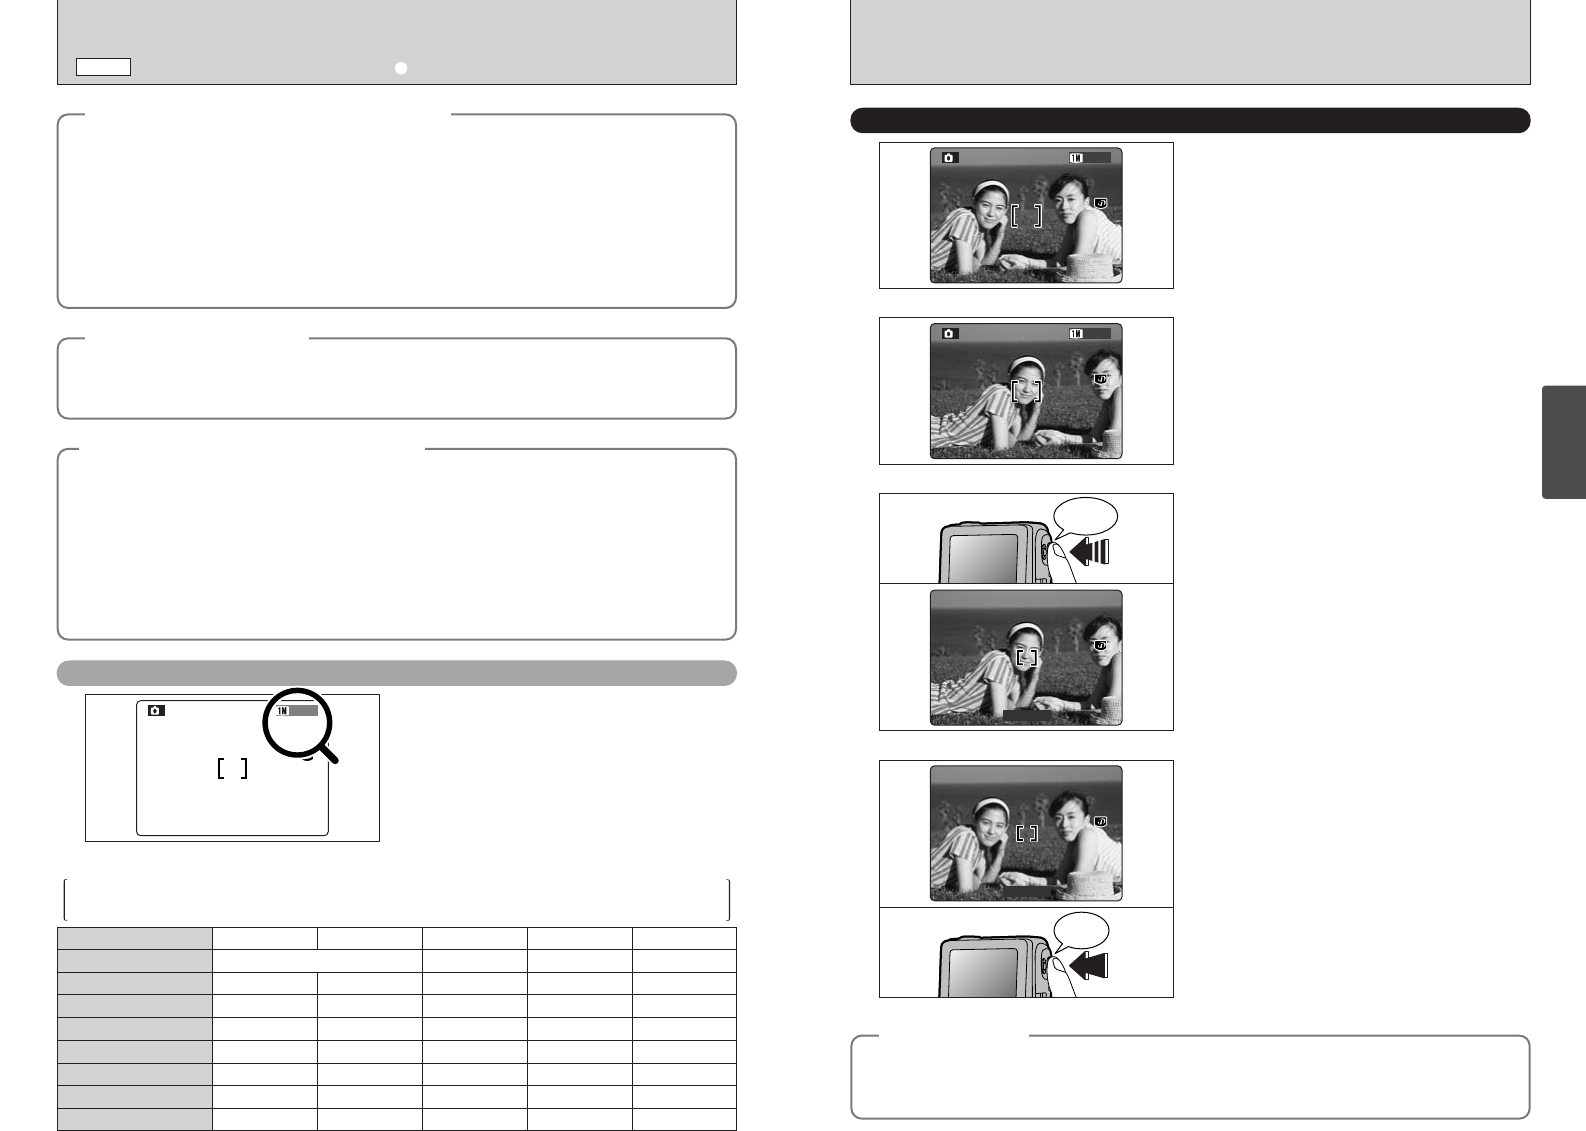
In a shot with this type of composition, the
subjects (two people in this case) are not in the
AF frame. If the shot is taken at this point, the
subjects will not be in focus.
Move the camera slightly so that one of the
subjects is in the AF frame.
When you press the shutter button down
halfway, the camera emits a short double-beep
and focuses on your subject. At that point, the
AF frame on the screen becomes smaller and
the camera sets the shutter speed and aperture
(The indicator lamp (green) changes from
blinking to lit.).
Continue to hold the shutter button down
halfway (AF/AE lock). Move the camera back to
the original image and then fully press down on
the shutter button.
●
!
You can reapply the AF/AE lock as many times as you
like before releasing the shutter.
●
!
The AF/AE lock operates in all photography modes and
can be used to ensure excellent results.
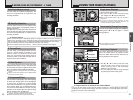
USING AF/AE LOCK
◆
AF/AE Lock
◆
On the FinePix M603, when you press the shutter button down half way, the focus and exposure
settings are fixed (AF/AE lock). If you want to focus on a subject that is off to one side of the image
or if you want to set the exposure before you compose the final shot, lock the AF and AE settings
and then compose and shoot your picture to get the best results.
◆
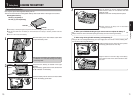
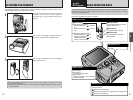
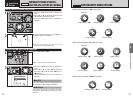
Checking the remaining battery charge
◆
◆
Power Save Function
◆
Switch the camera on and check that no battery level warning (Z, X or C) is displayed on
the screen (LCD monitor). If no icon is displayed, there is ample charge left in the battery.
i
Z Lit white: The battery is approximately half charged. (For the NP-120, this icon is
displayed when the remaining charge is approx. 1/4 or less.)
i
X Lit red: Battery charge low. Replace or recharge the battery as it will run out shortly.
i
C Blinking red: The battery is exhausted. The display will shortly go blank and the camera will
stop working. Replace or recharge the battery.
●
!
The above estimates are for the photography modes. In Playback mode, the transition from “Z” to “C”
may take less time.
●
!
Batteries with no remaining charge (C blinking red) will cause problems such as loss of power while the lens
is still extended. Always charge the battery before use.
When this function is enabled, the screen display goes blank to reduce power consumption if none of the
camera’s switches or buttons are used for approximately 30 seconds (➡P.70). If the camera remains
unused for an additional period (2 minutes or 5 minutes), it is automatically switched off. To switch the
camera back on, press the “POWER” button.
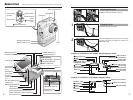
SHOOTING STILL IMAGES
(
U AUTO MODE
)
q
MODE