


6-12
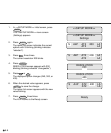
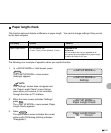
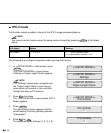
1. In <<SETUP MODE>> initial screen, press
ENTER
.
The <<SETUP MODE>> menu screen (Settings
or Paper Length Check) appears.
NOTE
The “Settings” screen does not appear and the
“Paper Length Check” screen first appears when
your scanner is not controlled through the video
or TP interface.
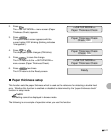
2. Press twice.
The <<SETUP MODE>> menu screen (Paper
Thickness Setup) appears.
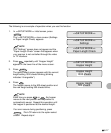
3. Press
ENTER
.
The paper load prompting screen appears,
requesting adjustment paper.
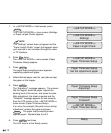
4. Select thickest paper used for your jobs and put
the paper on the hopper.
5. Press
ENTER
.
The “Adjusting!!” message appears. The scanner
lifts the hopper, feeds the paper, adjusts the
sensing level of the sensor, and saves its value.
After adjustment, the sheet is ejected and the
“Finished!!” message appears for two seconds,
then the LCD returns to the <<SETUP MODE>>
menu screen (Paper Thickness Setup).
If an error (for example, Mis-pick) occurs during
adjustment, remove the paper and press
CANCEL
. The paper load prompting screen
appears again. Repeat steps 4 and 5.
6. Press
CANCEL
two times.
The LCD returns to the Ready screen.
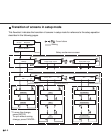
<<SETUP MODE>>
<<SETUP MODE>>
Settings
<<SETUP MODE>>
Paper Length Check
<<SETUP MODE>>
Paper Thickness Setup
Ready
Paper Thickness Setup
Set the adjustment paper
<<SETUP MODE>>
Paper Thickness Setup
Paper Thickness Setup
Adjusting!!
Paper Thickness Setup
Finished!!