6
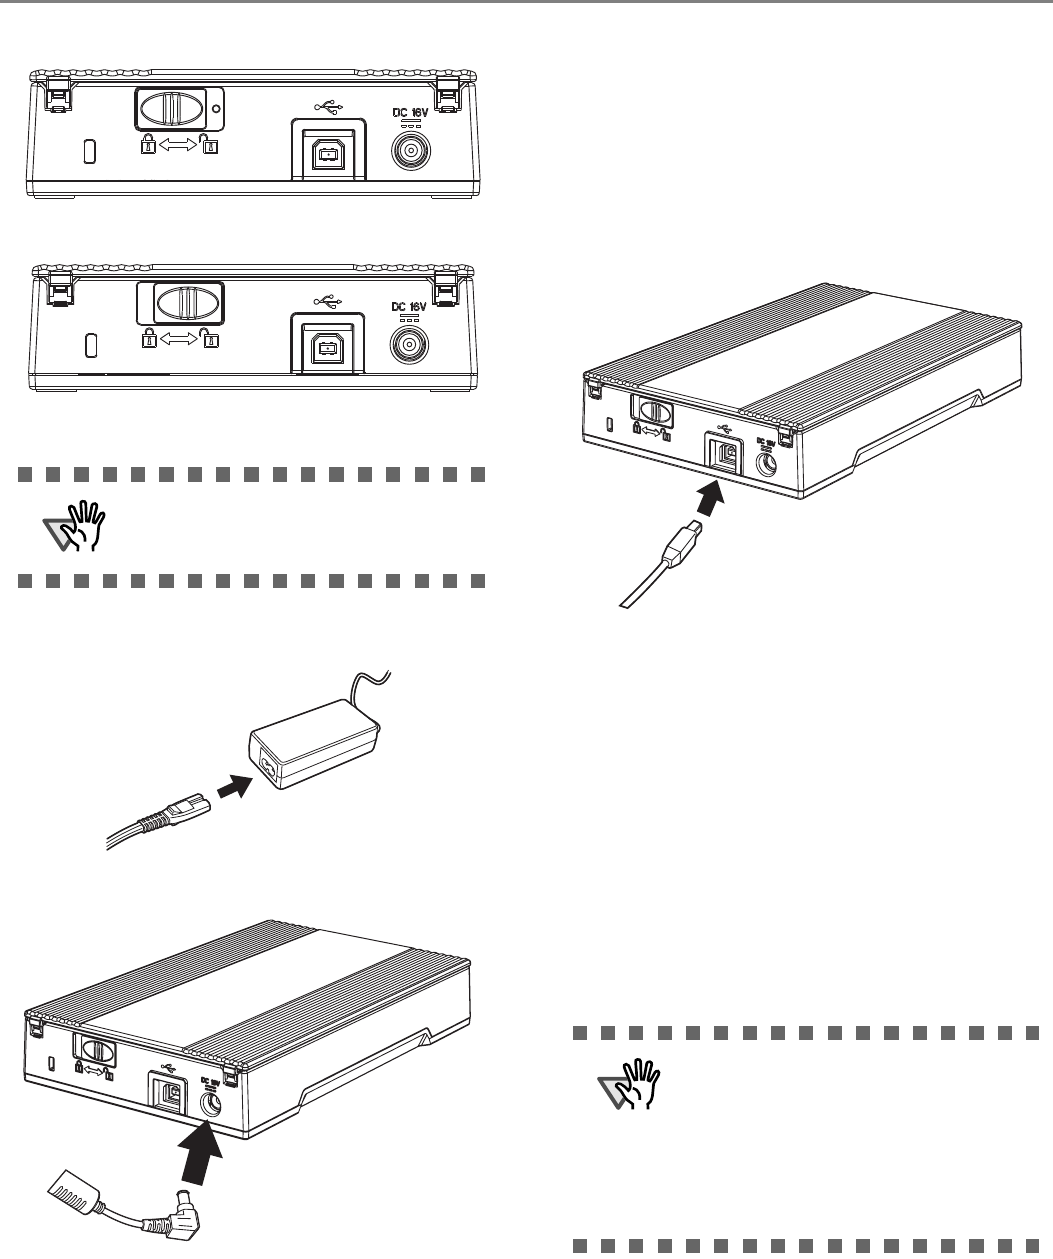
(locked)
(unlocked)
3. Connect the AC adapter.
1) Connect the AC cable to the AC adapter.
2) Connect the AC adapter connector to the scan-
ner’s DC inlet.
3) Plug the AC cable into the outlet.
2.3 Connecting the Scanner to
Your PC
■
Connecting the USB Interface Cable
1. Connect the USB interface cable to the USB
interface connector.
2. Connect the other end of the USB interface
cable to the PC.
Your scanner will be automatically detected.
For Windows 2000:
When [Digital Signature not Found] appears,
click [Yes].
For Windows Vista:
If you see the [Found New Hardware] dialog box,
select [Locate and install driver software], and
then in the [User Account Control] dialog box,
click the [Continue] button, if it is displayed.
The installation of the scanner is completed.
Use only the AC adapter and cable
provided by the manufacturer.
• Be sure to use the USB cable which
comes as an accessory with this
scanner.
Correct operation with commercially
available cables is not guaranteed.
• The scanner may not operate
correctly if you use a USB hub.
