


2-2
2.1 Installing the scanner
1.
Place the scanner at its installation site.
This scanner can be placed with the ADF
paper chute facing either right or left side of
the installing location.
For details on the scanner’s dimensions
and required installation space, refer to "10
SCANNER SPECIFICATION" in the "fi-
5650C Operator's guide".
2.
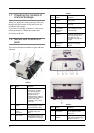
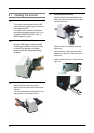
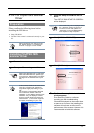
Setting the ADF Paper Chute.
Hold the ADF paper chute and insert
its tabs into the holes on the rear side
of the ADF as shown in the figure
below so that the side guides facing
upwards.
3.
Setting the Stacker
Mount the Stacker onto the scanner
aligning the protrusions to the holes on the
scanner.
You can fix the stacker at two positions: the
upper position or the lower position.
4.
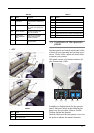
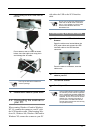
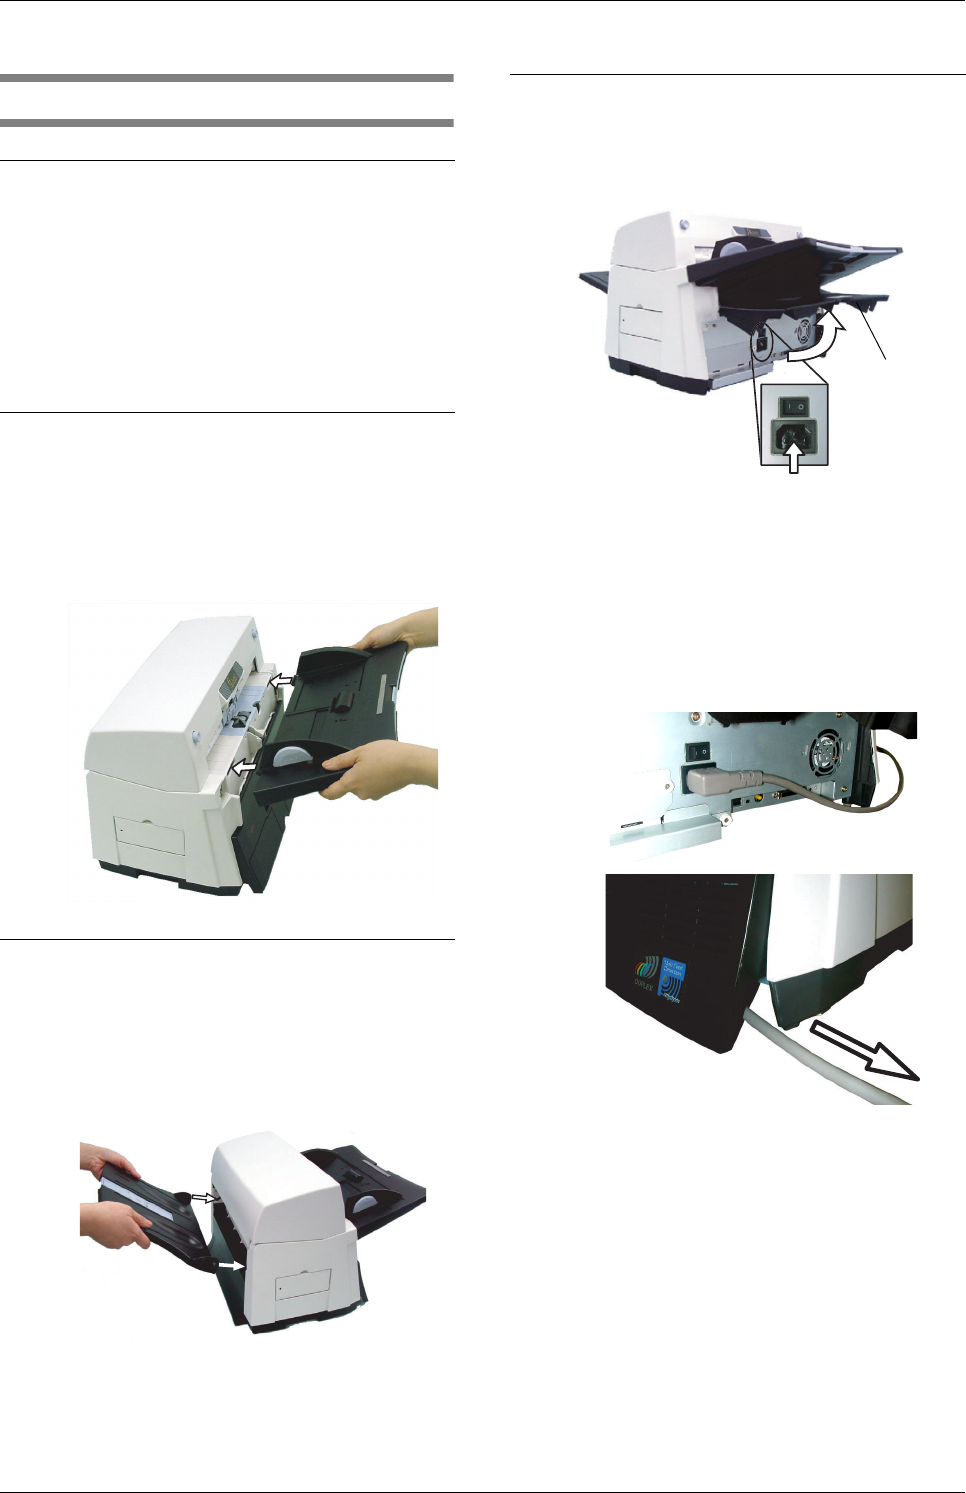
Connecting the AC cable.
Open the cable cover located below the
ADF paper chute and insert the AC cable
into the power inlet.
Once the cable is connected, close the
cable cover.
Lead out the AC cable from the conduit
located at the bottom of both sides of the
cable cover.
<When leading out the AC cable from the
right side>
Cable
cover