Getting Started, Identifying Controls - 22 -
Use this button to reset the linear time counter to 0:00:00.
44. Zoom Switch
This switch performs zooming electrically.
W: Picture becomes wider gradually.
T: Picture becomes telescopic gradually.
Note: The zoom switch on the remote control cannot change the zoom speed, but provides only low-speed
zooming.
Controlling the Picture on the LCD Monitor
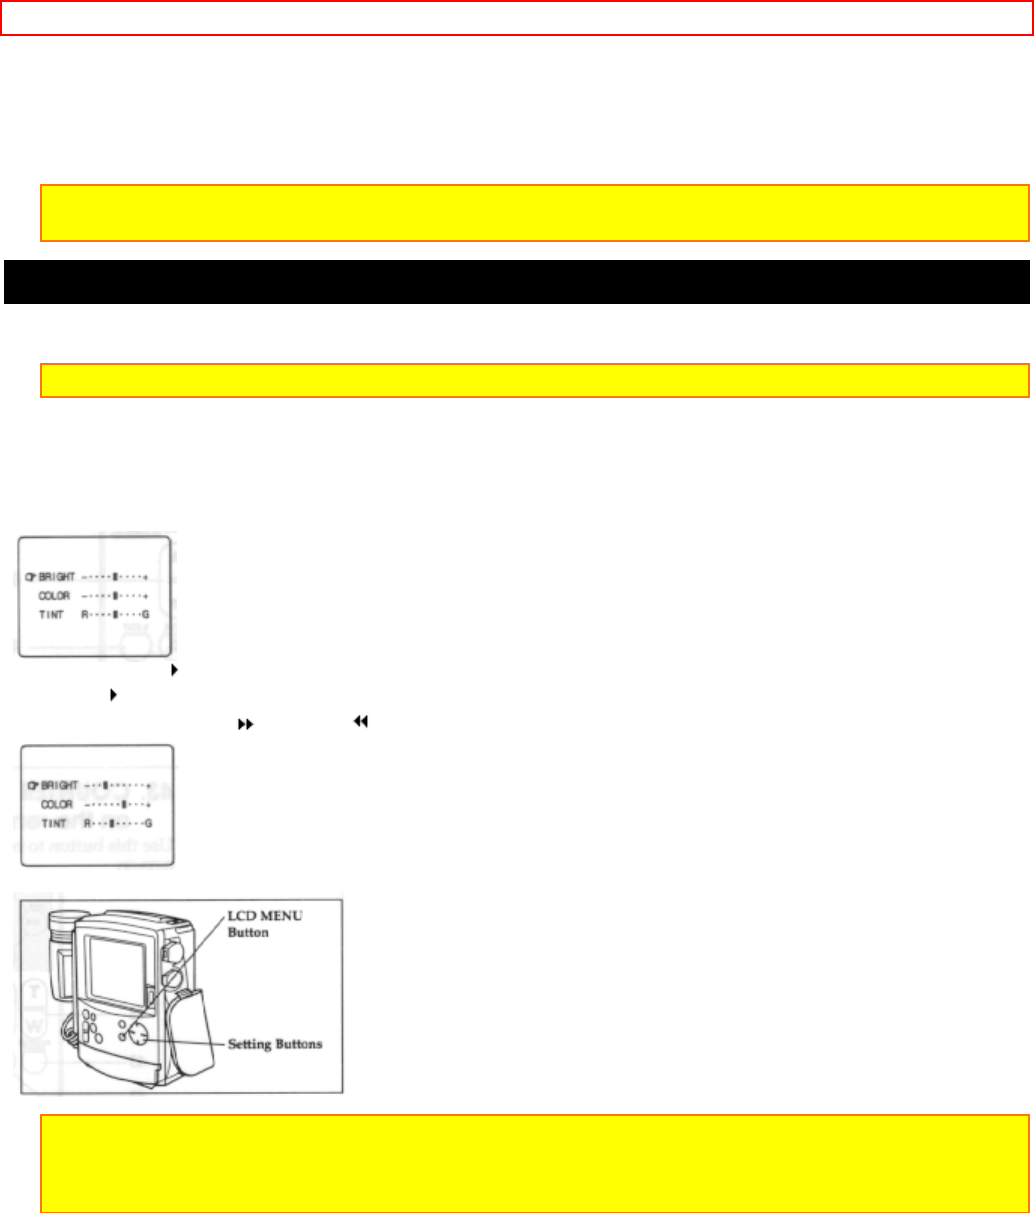
You can adjust the brightness, color and tint of the picture on the LCD monitor using the menu display.
Note: Even when the picture on the LCD monitor is adjusted, the recorded video will not change.
1. Load the battery ("Loading Batteries: Camcorder Battery", p.17). Press the red button on the CAM/OFF/VIDEO
switch as you slide it to CAM or VIDEO.
2. Press the LCD MENU button. The LCD picture adjustment screen will appear.
R: red
G: green
3. Press the play
or stop button to specify the item to be adjusted. The symbol (hand) moves up or down
each time
or is pressed.
4. Press the fast forward
or rewind button to adjust each setting.
5. Press the LCD MENU button. The LCD picture adjustment screen will disappear.
Note: If the adjustment screen is left as it is for about 1 minute, it will disappear automatically without pressing
the LCD MENU button.
Note: The adjusted values are held even after the power is turned off.
iiiCautions on LCD Monitor Screen:
• Do not touch the LCD screen with you fingers as the screen could get dirty and the picture
will not be seen clearly. If the LCD screen becomes dirty, use the LCD cleaner provided to
wipe off the dirt.
• If the camcorder is used in a cold place and becomes too cold, the LCD screen will be dim for
a while after the power is turned on. When the temperature inside the camcorder rises, the
brightness of the picture will become normal.
