


HD3MDIH/X EQUIP Series Indoor High Resolution True Day/Night IP Dome Camera User Guide
Document 800-07361 Rev A 21
12/10
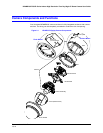
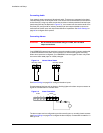
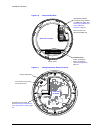
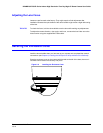
4. Pull the cables through the back or side entries of the camera skirt, back box and/or
adapter plate (as required), then connect the green connector strip to the camera
assembly. You might have to remove the cover plate for flush mounting the camera.
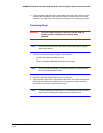
Connecting Power
WARNING! The use of a CSA Certified/UL Listed Class 2 power supply is
required to ensure compliance with electrical safety
standards.
Note Check the power source from the external power supply before applying
power to the camera.
1. Connect the appropriate power supply for your installation:
• 24 VAC power supply (proceed to step 2)
or
• Power over Ethernet (IEEE 802.3af) 48 VDC power supply
Note If you are using PoE (802.3af), power will automatically be supplied to the
camera through the network cable.
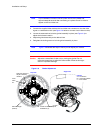
2. Connect to the power supply (see Figure 2-6 on page 22).
3. Plug the power supply into an appropriate power source. The LED on the RJ45 jack
illuminates when the camera receives power. If it does not illuminate, check the
terminal block connections and the power source.
Note To ensure satisfactory performance, it is recommended that you use a UPS
source when connecting the camera to a 24 VAC power source.