


EN 13
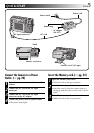
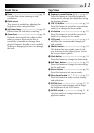
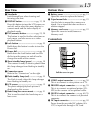
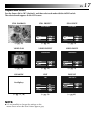
Rear View
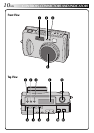
1 Viewfinder
Look through here when framing and
focusing your shot.
2 DISPLAY button .................... ੬ pg. 31, 38
Press this button to turn the LCD screen on
and off, and to select the menu display in
camera mode and the index display in
playback mode.
3 EXE (execute) button ............. ੬ pg. 23, 50
This button is used to finalize selections on
each menu, and also serves as a video
playback button.
4 Lock button .................................੬ pg. 23
Hold down this button in order to turn the
Power dial.
5 Power dial ................................... ੬ pg. 23
Hold down the Lock button and turn this
dial to turn the power on and off and to
change the mode of the camera.
6 Shoot standby lamp (green) ........ ੬ pg. 30
The camera is ready to shoot a photo when
this lamp changes from flashing to steadily
on.
7 Connectors cover
Refer to the “Connectors” on the right.
8 Flash standby lamp (red) .............੬ pg. 33
The flash is ready when this lamp changes
from flashing to steadily on.
9 LCD screen .................................੬ pg. 15
The photo subject/playback picture is
displayed on this screen.
0 Hand strap/lens cover mount...... ੬ pg. 21
This is used to attach the hand strap or a
lens cover.
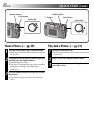
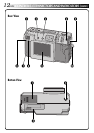
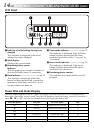
Bottom View
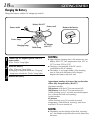
1 Battery cover ..............................੬ pg. 19
Open this cover to replace the battery.
2 Tripod mount hole ......................੬ pg. 25
Use this hole to mount the camera on a
tripod. Use a tripod that does not have a
rotation stopper.
3 Memory card cover..................... ੬ pg. 22
Open this cover to install/remove a
Memory card.
Pull the cover to open.
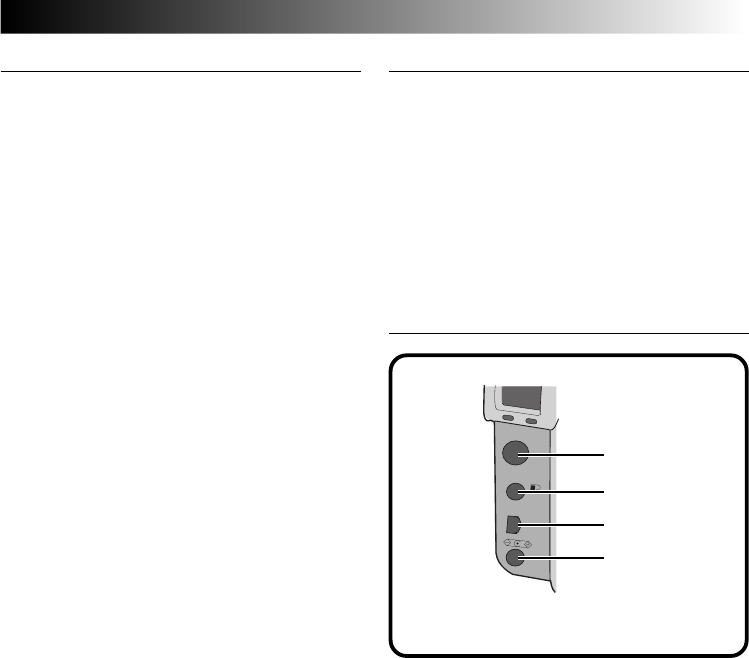
VIDEO
PRINTER
DIGITAL
DC
1
2
3
4
1 VIDEO output connector ............ ੬ pg. 58
This is to connect to view picture on a TV.
2 PRINTER output connector .........੬ pg. 59
This is to connect an optional printer (GV-
SP2) to the camera via an optional cable.
3 DIGITAL output connector ... ੬ pg. 68, 76
This is to connect the camera to a personal
computer.
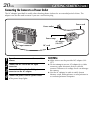
4 DC input connector .................... ੬ pg. 20
Power from the provided AC adapter (AA-
V37) is input here through a DC cord.
Connectors