


18
EN
BRI
GHT
25
min
90 min
89 min
3 min
2 min
1 min
0 min
min
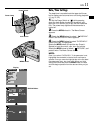
180°
90°
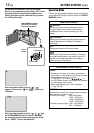
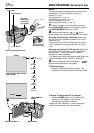
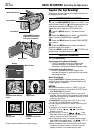
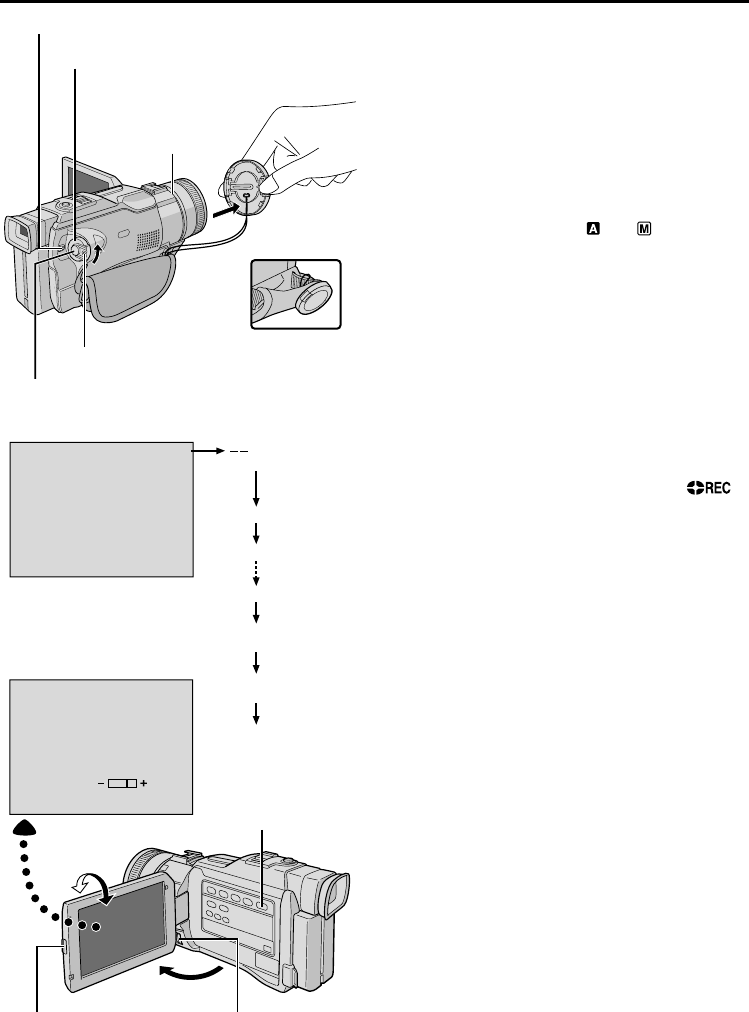
Power lamp
Tally lamp
(lights while
recording is
in progress)
Lock Button
Recording Start/Stop Button
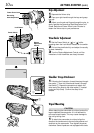
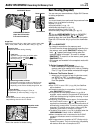
Tape remaining time indicator
(Approximate)
(Now calculating)
(Blinking)
(Blinking)
(Blinking)
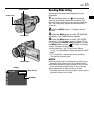
Display
MENU Wheel
To Adjust The Brightness Of The Display
.....rotate the MENU wheel until the bright level
indicator on the display moves and the
appropriate brightness is reached.
•When using the viewfinder, it is also possible to
adjust the brightness in this same manner.
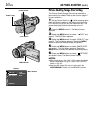
Power Switch
PUSH OPEN Button
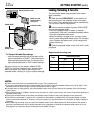
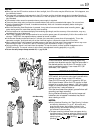
NOTE:
You should already have performed the procedures
listed below. If not, do so before continuing.
● Power (੬ pg. 8)
● Grip Adjustment (
੬ pg. 10)
● Viewfinder Adjustment (
੬ pg. 10)
● Load A Cassette (
੬ pg. 12)
● Recording Mode Setting (
੬ pg. 15)
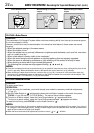
1 Press in the tabs on the lens cap to remove it.
Press PUSH OPEN, open the LCD monitor and set
the VIDEO/MEMORY Switch to “VIDEO”.
2 Set the Power Switch to “ ” or “ ” while
pressing down the Lock Button located on the switch.
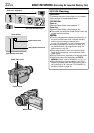
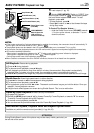
Shooting while using the viewfinder: Make sure
the LCD monitor is closed and locked. Pull out the
viewfinder fully.
•Be sure to pull out the viewfinder until you hear a
click, otherwise it may be pushed back in during
use.
Shooting while using the LCD monitor: Make sure
the LCD monitor is fully open and the viewfinder is
pushed back in. Tilt the LCD monitor upward/
downward for best viewability.
•The power lamp lights and the camcorder enters the
Record-Standby mode. “PAUSE” is displayed.
3 Press the Recording Start/Stop Button. “ ”
appears while recording is in progress.
To Stop Recording . . .
.....press the Recording Start/Stop Button. The
camcorder re-enters the Record-Standby mode.
During shooting
VIDEO/MEMORY
Switch
BASIC RECORDING
Recording On Tape