


20 EN
Master Page: Left-Heading0
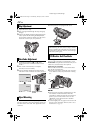
VIDEO PLAYBACK
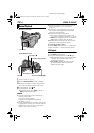
1 Load a cassette. (੬ pg. 15)
2 Set the VIDEO/MEMORY Switch to “VIDEO”.
3 Set the Power Switch to “PLAY” while pressing
down the Lock Button located on the switch.
4 To start playback, press 4/9.
5 To stop playback, press 8.
● During Stop mode, press 3 to rewind, or
5 to fast-forward the tape.
NOTES:
● Clean the video heads using an optional dry
cleaning cassette when:
• No picture during playback.
• Blocks of noise appear during playback.
For details, ੬ pg. 75.
● If Stop mode continues for 5 minutes when power
is supplied from a battery, the camcorder shuts off
automatically. To turn on again, set the Power
Switch to “OFF”, then to “PLAY”.
● The playback picture can be viewed in the LCD
monitor, viewfinder or on a connected TV.
(੬ pg. 22)
● You can also view the playback picture on the
LCD monitor with it flipped over and pushed
against the camcorder body.
● LCD monitor/viewfinder indications:
• When power is supplied from a battery: the
“ ” battery indicator is displayed. (੬ pg. 84)
• When power is supplied from an AC outlet: the
“ ” battery indicator does not appear.
● When a cable is connected to the AV connector,
the sound is not heard from the speaker.
To control the speaker volume…
Rotate the MENU Wheel towards “+” to turn up the
volume, or towards “–” to turn down the volume.
Still Playback
Pauses during video playback.
1) Press 4/9 during playback.
2) To resume normal playback, press 4/9 again.
● If still playback continues for more than about
3 minutes, the camcorder’s Stop mode is
automatically engaged.
● When 4/9 is pressed, the image may not
pause immediately while the camcorder
stabilizes the still image.
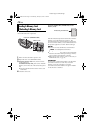
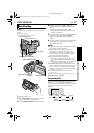
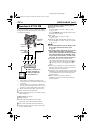
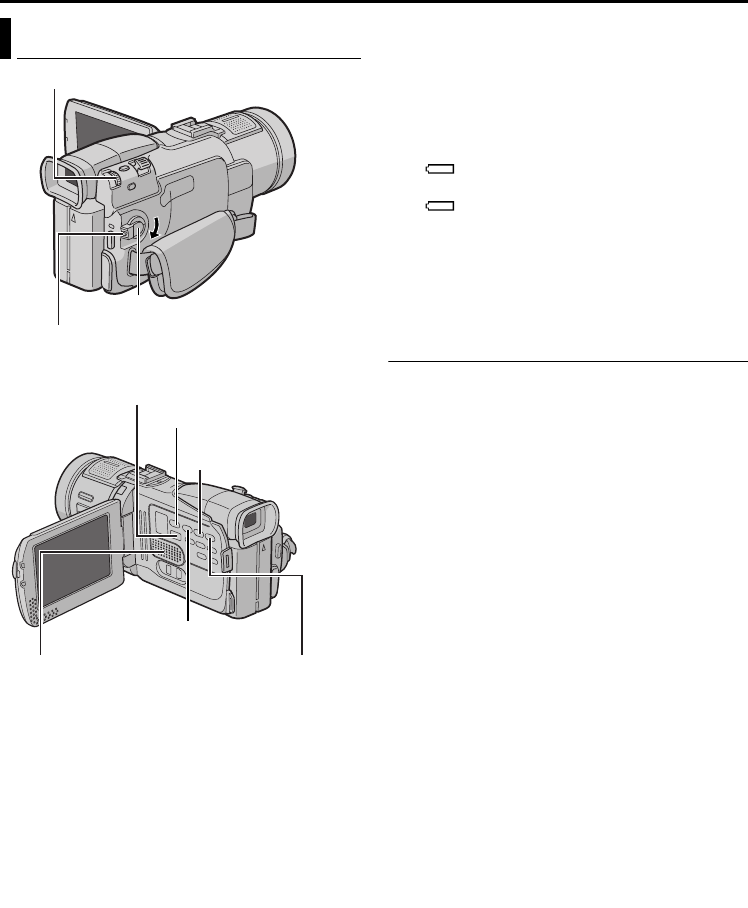
Normal Playback
Speaker
Play/Pause Button (4/9)
Lock Button
Rewind Button (3)
VIDEO/MEMORY Switch
Power Switch
Stop Button (8)
MENU Wheel (VOLUME)
Fast-Forward Button (5
)
GR-DV801US.book Page 20 Wednesday, January 22, 2003 5:39 PM