


16
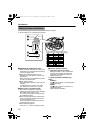
Installation and Connection
Follow the procedures below to connect/set this
unit.
Turn off the power of devices to be used before
connecting the cables.
K
K
K
K
K
K
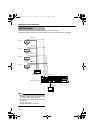
Procedures from
Connection to Setting
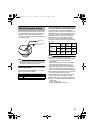
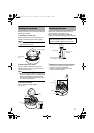
ⅷ Before touching the camera unit, make
sure to touch the metal surface of the
[MONITOR] terminal to discharge any
static electricity from your body. Static
electricity may cause the camera to
malfunction.
ⅷ When mounting the base to the ceiling, or
when connecting the cable of the camera
unit, pay enough attention to the fall of
each part.
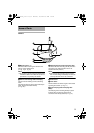
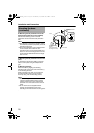
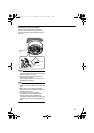
step 1
Set the switches
(A Pg. 17)
Remove the dome cover, followed
by setting the video image
switches.
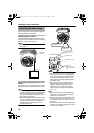
step 2
Mounting the base
(A Pg. 17)
Mount the base to the wall or
ceiling.
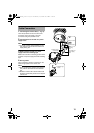
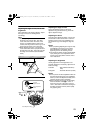
step 3
Connect the cable
(A Pg. 19)
Connect the coaxial cable and
power supply for the heater.
step 4
Mounting the camera unit
(A Pg. 20)
Fill the piping hole and screw hole
with a sealing material, followed
by mounting the camera unit to
the base.
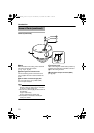
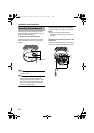
step 5
Adjusting the video image
(A Pg. 22)
Adjust the camera’s angle, focus
and brightness.
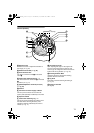
step 6
Mounting the inner dome
(A Pg. 24)
After setting is complete, mount
the inner dome to the camera.
step 7
Mounting the dome cover
(A Pg. 24)
Insert the silica gel into the
designated space to prevent
fogging of the dome cover,
followed by mounting the dome
cover.
TK-C215VP4_JP.book Page 16 Wednesday, September 20, 2006 5:48 PM