


20
Setup
Mounting the camera directly on a
ceiling or alongside a wall
To mount on a wall, use the same procedures
below but replace the word “ceiling” with “wall”.
Ⅵ Setup
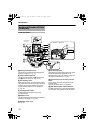
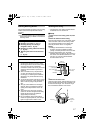
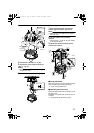
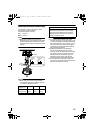
1.Open a hole in the ceiling (R35 mm,1-3/8
inches)
Use the attached template to drill a hole in the
ceiling.
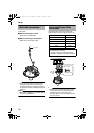
2.Draw the fall-prevention wire, LAN cable,
power cable and alarm cable from the ceiling.
These are mounted beforehand on the
ceiling slab. (The fall-prevention wire is not
supplied)
Note:
● Also pay careful attention to the length,
strength, wiring and material (insulation
quality) of the fall-prevention wire to be used.
● For the fall-prevention wire, the inside
diameter of the ring section to be mounted on
the camera unit should be between R3.1 mm
and R5.5 mm, and the outside diameter
should be below R9 mm.
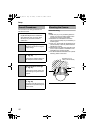
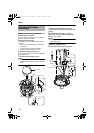
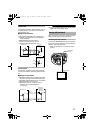
3.Remove the dome cover.
As shown in the picture, hold the dome ring such
that the position alignment mark is between your
thumb and index finger. Turn the dome ring in
the anti-clockwise direction and remove.
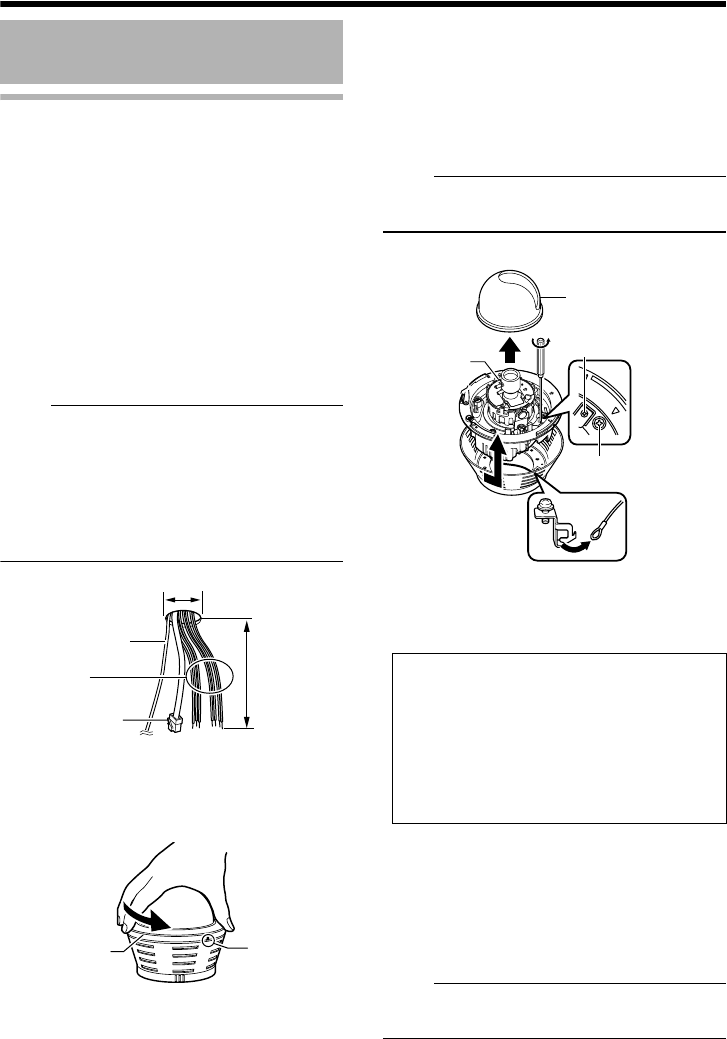
4.Remove the inner dome.
The inner dome is secured by 3 clips. Remove
the inner dome from the clips.
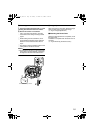
5.Remove the outer case.
A Loosen the camera fastening screws with a
screwdriver.
B Turn the camera in the anti-clockwise
direction and remove the outer case.
C Remove the fall-prevention wire from the
fastening hook
6.Loosen the pan fastening screw.
Note:
●
The lens section may be damaged if you operate
it without loosening the pan fastening screw.
7.Configure image settings. (A Pg. 13)
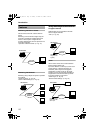
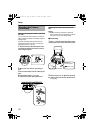
Ⅵ Connection
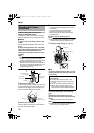
1.Face the imaging direction mark (j) in the
shooting direction and mount the outer case
on the ceiling.
2.Hitch the fall-prevention wire that was
removed in Setup step 4 on the fastening
hook.
3.Mount the fall-prevention wire on the
camera. This wire connects the camera to the
ceiling.
(The fall-prevention wire is not supplied.)
Note:
● Tighten all screws securely. Otherwise the
camera may come loose and fall.
Mounting the Camera
(continued)
1
2
Approx. 100 mm
(3-7/8 inches)
R
35
mm
(1-3/8 inches)
Fall-prevention wire
(not supplied)
LAN cable
Power cable,
alarm cable
Position
alignment mark
Dome ring
About the outer case mounting screws
(not supplied):
● Use a screw head of less than 3 mm.
● The mounting hole of the outer case is R
4.5 mm.
●
Do not use a flat countersunk head screw.
● When using an impact driver, do not
tighten right to the end. Tighten with your
hand. The outer case may be damaged.
B
A
C
4
5
7
5
5
6
Camera Fastening
Screw
Pan fastening screw
Inner dome
VN-C215_EN.book Page 20 Monday, November 27, 2006 9:46 AM