


7
IP address setting at the computer
Set the computer to an IP address that enables communication with the camera.
Procedures described in this item are intended for Windows XP users.
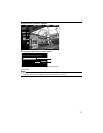
1.Click [Start]
● Select in the sequence of [Control Panel]-[Network Connection]-[Local Area].
Windows Vista :
● Select in the sequence of [Settings]-[Control Panel]-[Network and Sharing Center]-[Manage
network connections].
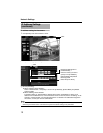
2.The computer on which Internet Explorer is launched automatically selects the connected
network
● Right-click and select [Properties].
● Check to ensure that the [Client for Microsoft Networks] and [Internet Protocol(TCP/IP)] check
boxes are selected.
Windows Vista :
● Check to ensure that the [Microsoft Network Client] and [Internet Protocol Version 4 (TCP/IPv4)]
checkboxes are selected.
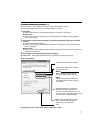
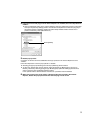
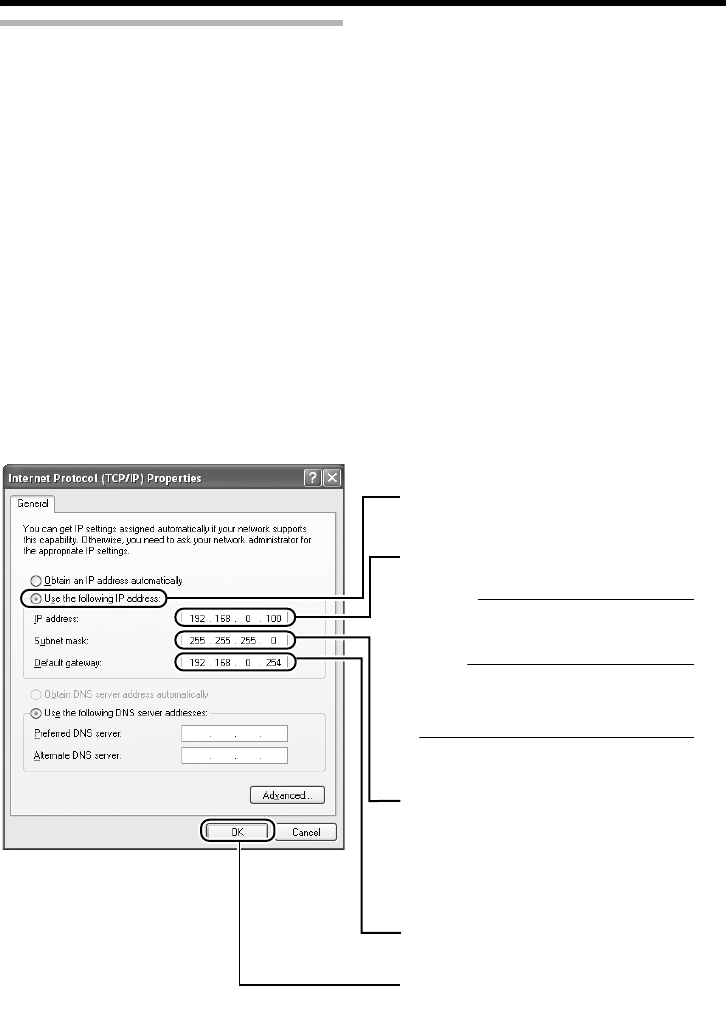
3.Select [Internet Protocol(TCP/IP)] and click [Properties]
Windows Vista Select [Internet Protocol Version 4 (TCP/IPv4)], and click [Properties]
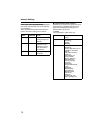
4.Set the IP address
5.Click [OK] on the ALocal Area Connection PropertiesB screen
A
B
C
D
E
Specify the [IP address]. (For example,
use 192.168.0.100)
Memo:
Make sure that you take note of the
original IP address before altering.
Note:
Ensure that a duplicate IP address is
not specified within the same network
environment.
Set [Subnet Mask] to a value that is
appropriate for the setting operation.
Consult the network administrator if you
have any queries. (Use 255.255.255.0 whe
n
the camera is in its default settings.)
Select [Use the following IP address].
When a [Default Gateway] is present,
make use of the corresponding IP
address (e.g., 192.168.0.254).
Click