


19
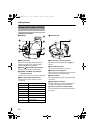
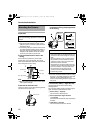
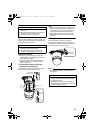
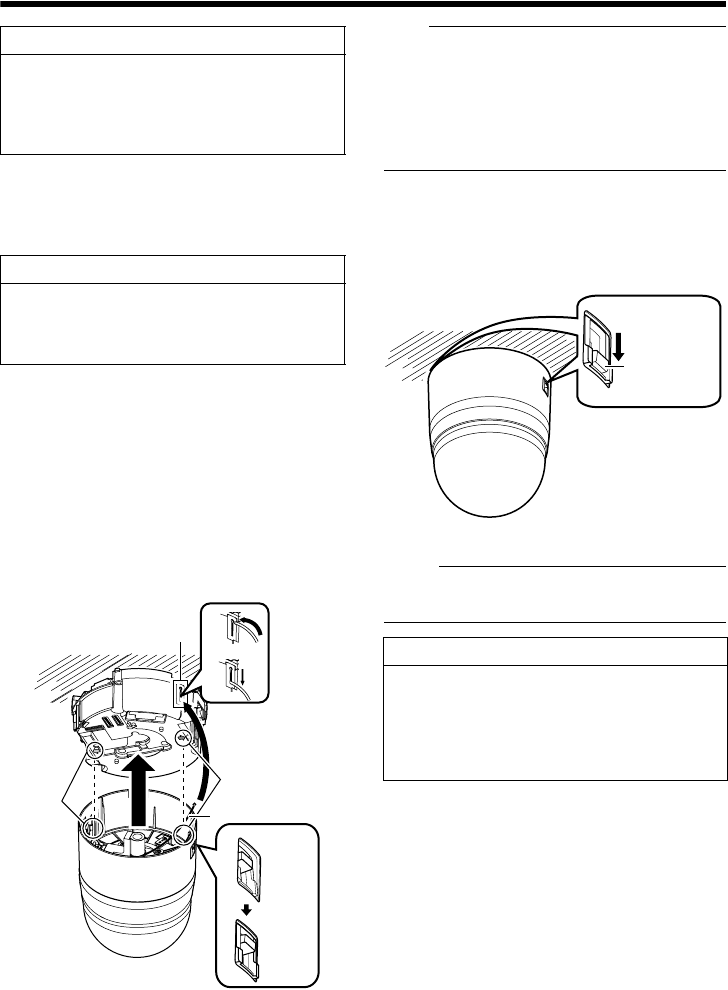
5 Mount the fall prevention wire
Mount the fall prevention wire, which is attached to
the camera, to the fall prevention wire fixing bracket
of the ceiling clamping bracket.
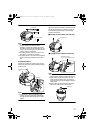
6 Mount the camera
● Align the ADB mark (blue)/(red) inside the
camera with the ADB mark (blue)/(red) on the
ceiling clamping bracket.
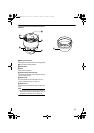
● Insert the camera into the ceiling clamping
bracket until you hear a click sound and
mount it securely.
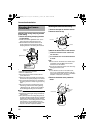
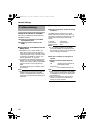
7 Check that the camera fixing lock
knobs (x2) are sticking out.
If the camera is mounted on securely, the camera
fixing lock knobs (x2) will stick out a little.
Note:
● Before mounting the camera, check that the
camera fixing lock knobs are not locked (i.e.,
lock knobs are on top). The camera cannot
be mounted if the lock knobs are locked.
● When pulling out the cables from the side,
remove the cable cover of the camera. (A
Page 16)
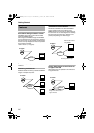
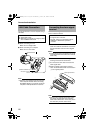
8 Lock
When the camera is mounted on the ceiling
clamping bracket, lower the camera fixing lock
knobs (x2) in the direction of the arrow and secure
the camera such that it does not fall off.
M
emo:
● To remove the camera, follow the reverse
procedures.
Caution
● The dome cover is an optical parts. Handle
with care.
● When mounting the dome cover, make sure
that there is no dirt inside the cover.
● Tighten the dome cover securely.
Caution
● Be sure to connect the fall prevention wire.
Otherwise, the camera may fall.
● To prevent danger, do not leave the fall
prevention wire dangling by the camera.
6
5
7
D mark
(blue)
Fall prevention
wire fixing bracket
Fall Prevention Wire
D mark (red)
During
mounting
After
mounting
Caution
● Be sure to check that the camera fixing lock
knobs (x2) are locked securely. Otherwise,
the camera may fall.
● After mounting, check that the camera is
mounted securely. Improper mounting may
cause the camera to fall off.
Camera fixing
lock knob (x2)
VN-V686WPU_EN.book Page 19 Wednesday, January 16, 2008 10:39 AM