


42
A
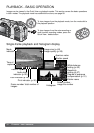
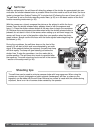
UTO-RECORDING MODE - ADVANCED OPERATION
Used for self-portraits, the self-timer will delay the release of the shutter for approximately ten sec-
onds after the shutter-release button is pressed. When the drive mode is set to self-timer, the focus
mode is changed from Subject Tracking AF to single-shot AF allowing the use of focus lock (p. 53).
The self-timer is set on the auto-recording mode menu (p. 38) or in the basic section of the multi-
function recording mode menu (p. 56).
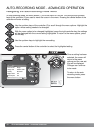
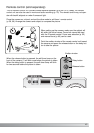
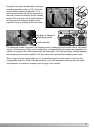
With the camera on a tripod, compose the picture so the subject is within the focus
frames. Press the shutter-release button partway down to lock the exposure and
focus (1). Press the shutter-release button all the way down to begin the countdown
(2). Because focus and exposure are determined when the shutter-release button is
pressed, do not stand in front of the camera when setting up a self-timer image, the
camera will focus on you in that position rather than your position when the photo-
graph is taken. Always confirm the focus with the focus signals before beginning the
countdown (p. 53).
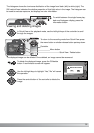
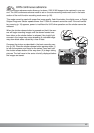
During the countdown, the self-timer lamp on the front of the
camera (3) will start to blink and is accompanied by an audio
signal. A few seconds before the exposure, the self-timer lamp
will blink rapidly.The lamp will glow steadily just before the
shutter fires. To stop the countdown, turn the mode dial to
another position. The self-timer drive mode is cancelled after
the exposure. The audio signal can be turned off in the custom
1 section of the setup menu (p. 96).
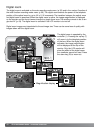
The self-timer can be used to minimize camera shake with long exposures. When using the
camera on a tripod, photographs of static subjects (landscapes, still-lifes, or close-up pho-
tographs) can be made with the self-timer. Because no contact is made with the camera during
exposure, there is no risk of camera shake caused by the operator.
Shooting tips
1
3
Self-timer
2