English
Using e-mini M as a Digital Camera
The camera allows you to easily take digital photo shots. This section shows you how
to take pictures with the camera.
Taking Pictures
Set the camera to DSC mode when you want to take pictures. To take digital photo
shots with the camera, make sure that there is enough battery power or that the op-
tional power adapter is properly connected. (See page 10 to 11 for details on how to
insert batteries or connect a power adapter.) Connecting a USB cable between the
camera and your PC can also provide power to the camera. (See page 18 to see an
illustration of how to connect a USB cable.)
If you want to use a Compact Flash memory card to store your pictures, insert the
memory card before you start taking pictures. Without a Compact Flash memory card
installed, the pictures are stored in built-in memory. (For more information on inserting
memory card, see page 12 ).
To take a picture:To take a picture:
To take a picture:To take a picture:
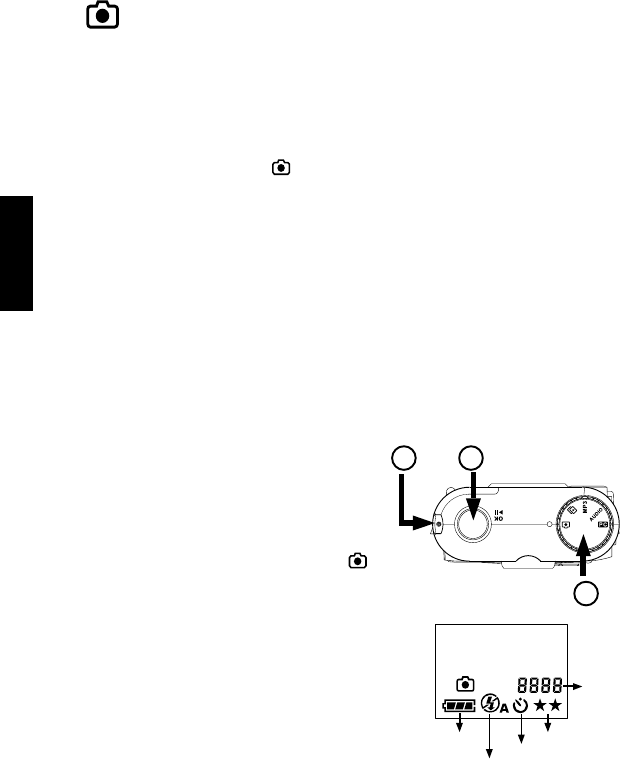
To take a picture:
1. Turn the camera on by pressing the Power
Button. The Ready LED located on the top
of the camera then lights up.
2. Make sure that the camera is in DSC mode.
To set the camera to
DSC modeDSC mode
DSC modeDSC mode
DSC mode, turn the
Mode Dial repeatedly until you see the
icon appear on the LCD panel.
3. Using the viewfinder to line up the camera
with the object you want to capture.
4. Hold still and press the Shutter Release but-
ton to take the picture.
5. The Ready LED blinks continuously as the
camera captures and processes the image.
6. When the Ready LED stops blinking, you can
take the next picture. (The Ready LED always
remains lit while the camera is on.)
Remaining
photo shots
Battery Power
Picture Quality
Self-timer
1
2
4
LCD panel in DSC ModeLCD panel in DSC Mode
LCD panel in DSC ModeLCD panel in DSC Mode
LCD panel in DSC Mode
14
No Flash or Auto Flash
