


165
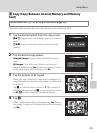
Displaying Pictures with the Projector (Projector Mode)
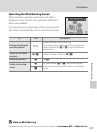
Using the projector
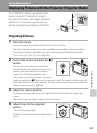
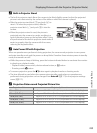
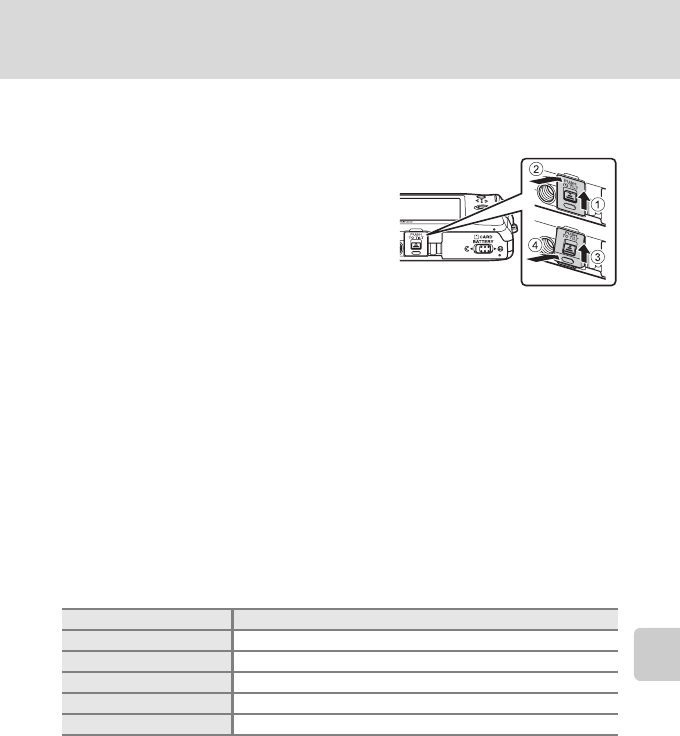
C Built-in Projector Stand
• The built-in projector stand allows the camera to be tilted slightly upward so that the projected
picture is not obstructed by the surface of the table on which the camera is placed.
• Slide the projector stand latch (
1
) and push (
2
) to
raise it. To lower the projector stand, slide the
projector stand latch (
3
) and push (
4
) it into the
camera.
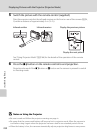
• When the projector stand is used, the picture is
projected onto the screen at an angle, resulting in a
type of distortion known as the keystone effect. Using
a tripod instead of the built-in projector stand makes it
easier to properly align the camera with the screen,
reducing the keystone effect.
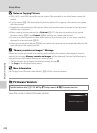
C Auto Power Off with Projection
When no operations are performed during projection, the camera ends projection to save power
and enter standby mode, and the power-on lamp blinks. If another three minutes passes in standby
mode, the camera turns off.
• While the power-on lamp is blinking, press the buttons indicated below to reactivate the monitor
in shooting or playback mode.
- Playback mode: power switch, shutter-release button, or c button
- Shooting mode: A button
• To resume projection, press the P button again in playback mode or shooting mode.
• The time allowed to pass before the camera enters standby mode when no operations are
performed during projection can be changed from Auto off (A 173) in the projector settings
menu (A172).
C Projection Distance and Projected Picture Size
Projection distance Projected picture size
26 cm (10 in.) Approx. 10 × 7.5 cm (4 × 3 in.; equivalent to 5-inch display)
50 cm (1 ft. 7 in.) Approx. 20 × 15 cm (8 × 6 in.; equivalent to 10-inch display)
1.0 m (3 ft. 3 in.) Approx. 40 × 30 cm (16 × 12 in.; equivalent to 20-inch display)
1.5 m (4 ft. 11 in.) Approx. 60 × 45 cm (24 × 18 in.; equivalent to 30-inch display)
2.4 m (7 ft. 10 in.) Approx. 94 × 70 cm (37 × 28 in.; equivalent to 47-inch display)