


55
Connecting to Televisions, Computers, and Printers
2
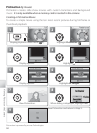
Choose an Interface > USB option as described in “Choosing a USB Option
for Connection to a Computer” ( 56) and then turn the camera off .
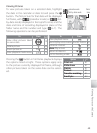
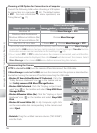
To copy both marked and unmarked pictures to the com-
puter, click the PictureProject Transfer button instead of
pressing the button in Step 5. See the Quick Start Guide
or PictureProject reference manual (on CD) for details.
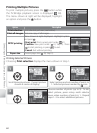
The PictureProject Transfer Button
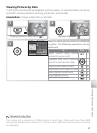
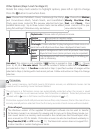
Pictures marked for transfer are shown by a icon during
playback. By default, all pictures are automatically marked
for transfer. Two options control transfer marking:
• Interface > Auto transfer (setup menu): Choose On to
mark all new pictures for transfer ( 89).
• Transfer marking (playback menu): Change marking for existing pictures ( 81).
Marking Pictures for Transfer
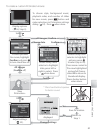
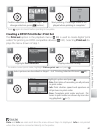
4
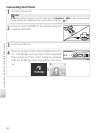
Place the camera in the COOL-STATION and turn it
on.
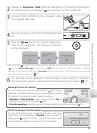
5
Press the ( ) button
*
to copy all marked pic-
tures to the computer. The following messages
will be displayed:
6
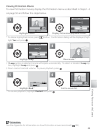
The pictures will be displayed in PictureProject when transfer is complete.
Disconnect the camera as described in “Disconnecting the Camera” ( 56).
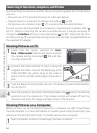
3
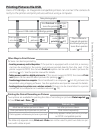
Connect COOL-STATION to the computer using
the supplied USB cable.
* Note that the button can not be used to transfer pictures if the memory card is locked
( 13) or if Mass Storage is selected for USB and no memory card is inserted. Transfer
pictures using the PictureProject Transfer button (see below). Pictmotion movies can be
transferred in PictureProject ( 52).