


Scene Mode 35
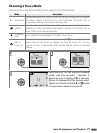
Taking Pictures for a Panorama
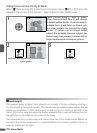
Selecting O (panorama assist) in the scene menu (B
29) displays the default pan direction as shown at
right. Take pictures as described below. Use a tripod
for better results.
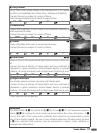
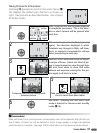
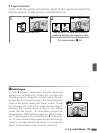
1
Select how pictures will be joined together
in completed panorama. This is the direc-
tion in which camera will be panned after
each shot.
2
Make selection (to return to Step 1, press B
again). Pan direction displayed in white.
Complete any changes to flash, self-timer,
focus, or exposure compensation settings
before proceeding to next step.
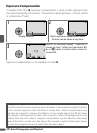
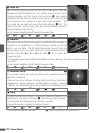
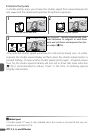
3
Take first shot; camera will focus on subject
in center of frame. About one third of pic-
ture is superimposed on view through lens.
AE-L icon turns white to show that white
balance and exposure settings for this pic-
ture apply to all shots in series.
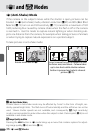
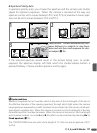
45
Compose next shot to overlap with
previous picture.
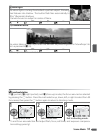
Take next shot. Repeat steps 4–5 until all
shots in series have been taken.
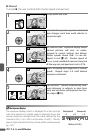
6
End series. Shooting will also end if new
mode is selected or camera enters standby
mode (B 16).
A Panorama Assist
Flash, self-timer, focus, and exposure compensation can not be adjusted after the first pic-
ture is taken. Pictures can not be deleted or zoom, image quality, or image size adjusted
until shooting is complete. See page 106 for information on how panoramas are stored.
9
9
91/125
1/125
1/125 F4.3
F4.3
F4.3
9
9
91/125
1/125
1/125 F4.3
F4.3
F4.3
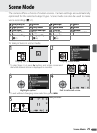
Right
to left
Bottom
to top
Top to
bottom
Left to
right
9
9
91/125
1/125
1/125 F4.3
F4.3
F4.3
8
8
81/125
1/125
1/125 F4.3
F4.3
F4.3
8
8
81/125
1/125
1/125 F4.3
F4.3
F4.3 7
7
71/125
1/125
1/125 F4.3
F4.3
F4.3