


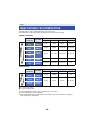


- 93 -
When disposing of your used products, perform [RESET Wi-Fi SETTINGS] to delete personal
information from this unit.
≥ Disassemble after the battery runs out.
≥ If it cannot be removed smoothly, contact Panasonic’s Service Center.
≥ Keep disassembled parts out of reach of children.
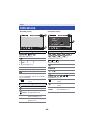
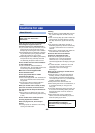
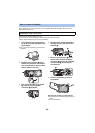
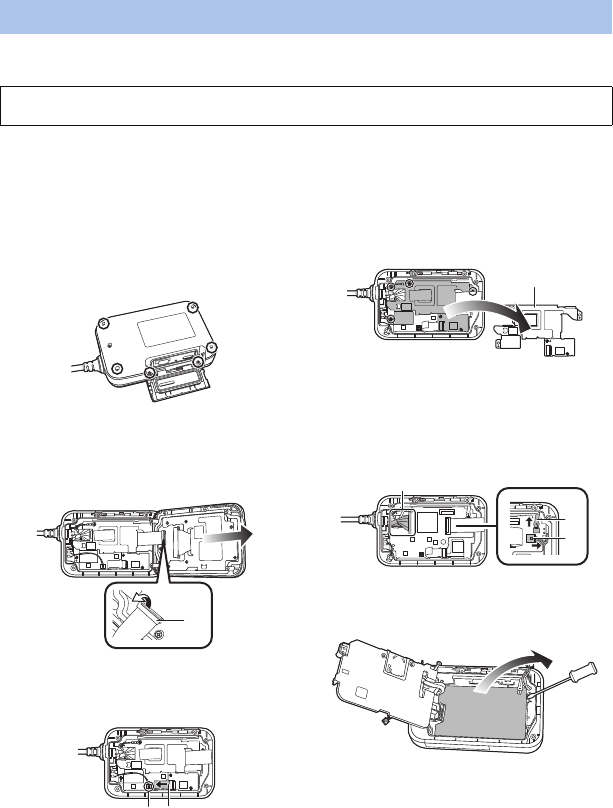
1 Open the side cover, and remove
all of the 6 screws indicated in the
figure below.
≥ Use a cross-slot screwdriver (commercially
available).
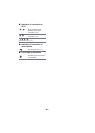
2 Remove the connector A of the
flexible circuit board, and remove
the circuit board on the front side
(button side) of this unit.
3 Pull out the flexible circuit board
B, and pull out the speaker
connector C upwards.
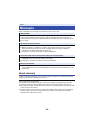
4 Remove the 4 screws indicated in
the figure below, and remove the
heatsink D.
5 Remove the connector E of the
camera unit, the built-in battery
connector F, and the NFC flexible
circuit board G, and lift up the
circuit board.
6 Remove the battery by using a
screwdriver.
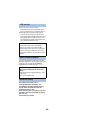
Regarding the handling of used batteries
≥ Insulate the terminals with cellophane tape or
similar.
≥ Do not disassemble.
How to remove the battery
This figure describes the disposal of this unit, it is not instruction for repair. If
disassembled, repair is not possible.