


With a PC
50
LSQT0973
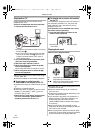
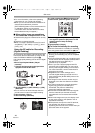
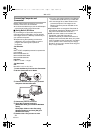
Connecting Computer and
Camcorder
Before making these connections, turn off all
devices, which are to be connected.
≥It is recommended that you use the AC Adaptor
as the power supply of the Camcorder.
ª
Using Built-in SD Drive
By connecting the Camcorder and personal
computer with the USB cable, you can transfer
still images saved on a Memory Card directly to
your personal computer.
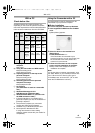
≥Despite having the operating environment
indicated, it may not be possible to use the
program with some types of personal
computers.
For Windows
OS:
IBM
®
PC/AT compatible personal computer with
pre-installed;
Microsoft Windows XP
Microsoft Windows 2000
Microsoft Windows Me
Interface:
USB 1.1 or later — A type
For Macintosh
OS:
Mac OS X v 10.1 to X v 10.3
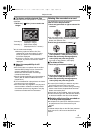
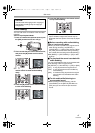
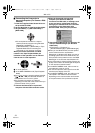
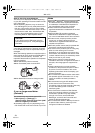
1 Insert the Memory Card into the Camcorder.
2 Set the Camcorder to PC Mode.
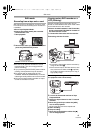
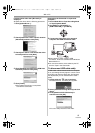
3 Connect the Camcorder to your personal
computer with the USB cable.
4 Camcorder power is turned on.
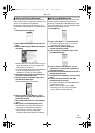
5 Open [My Computer] and click
[Removable Disk] (For Windows Me/2000
users).
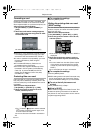
Click [Open folder to view files using
Windows Explorer] and then [OK] (For
Windows XP users).
6 Double-click a file you want to view.
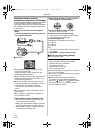
≥You can view images stored on the Memory
Card and also save them to your hard disk.
≥Do not change file or folder names on the
personal computer. The images on the
Memory Card may not be viewable on the
Camcorder.
≥Appropriate driver to recognize Camcorder is
automatically installed by Windows Plug and
Play when connected for the first time.
≥USB connection cable is connected to the
Camcorder, open [My Computer] or
[Windows Explorer] to check that the drive is
displayed as a removable disk drive (only when
card is inserted into the Camcorder). It enables
you to operate it in the same way as a floppy
disk drive, and you can use the same drag and
drop or copy methods.
PC
LSQT0973ENG.book 50 ページ 2006年1月30日 月曜日 午前11時40分