


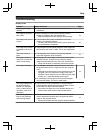


Error messages
Message Cause & Solution Page
CANNOT CONNECT TO
CA
MERA
The following may be causing the problem.
R T
he Wireless Camera is turned off.
–
Turn the Wireless Camera on.
10
R The batteries of the Wireless Camera have run out of
p
ower.
– Replace the batteries.
22
R The Wireless Camera is turned on, but the Wireless
C
amera is out of range from the Base Unit.
– Move the Base Unit to a location closer or without
obstructions. (When the Wireless Camera is in range of
the Base Unit it can connect to the Base Unit.)
– Then, turn the power for the Wireless Camera off then
on. (When the Wireless Camera is in range of the Base
Unit it can connect to the Base Unit.)
– When using a replacement Wireless Camera (while your
original Wireless Camera is being serviced), the
replacement Wireless Camera must be paired to the
Base Unit. Refer to the instructions below for pairing the
Wireless Camera.
8
10
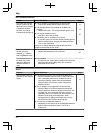
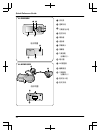
n How to pair Wireless Cameras
P
erform the following operations on the Base Unit, then
perform the operations on the Wireless Camera within 2
minutes.
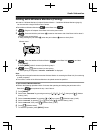
Base Unit operations:
A Press and hold the pair button located on the bottom side
of the Base Unit for about 13 seconds (until the pair indicator
flashes quickly) with a pointed object.
R The pair indicator will start to slowly flash after about 3
seconds of pressing the pair button, then after about an
additional 10 seconds the pair indicator starts flashing
quickly (enters Camera pairing mode).
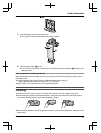
Wireless Camera operations:
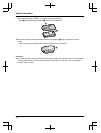
B Insert the batteries (page 22).
C Turn the power for the Wireless Camera on while pressing
the pair button with a pointed object (keep pressing the pair
button until the pair indicator starts flashing).
R The pair indicator starts flashing quickly.
– The pair indicator changes in the following manner
when pairing is successfully completed:
flash quickly ® light for about 10 seconds ® go out
– Pairing must be performed again if the pair indicator
changes in the following manner:
flash quickly ® go out
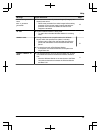
Protected picture
R
e
move protection
R T
he images are protected and therefore cannot be deleted.
–
Remove the protection to delete protected images.
18
28
Help